Image Slider

The 40s Knit Dress aka Vogue 8728

Wednesday, May 29, 2013
Vogue 1


Yesterday was my birthday and I was mighty spoilt! I am currently writing this post on my brand spanking new MacBook Air courtesy of my awesome Husband :) My parents gave me a Lady Valet dress form as a combined birthday and christmas 2012 present and I am the proud owner of a 1kilogram box of praline chocolates. This could end badly...

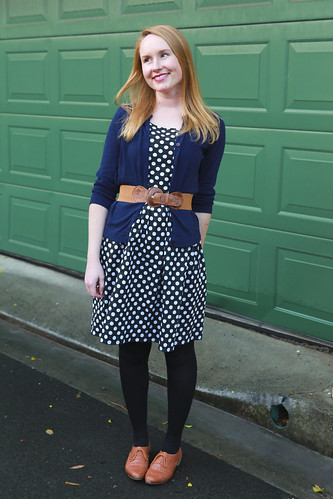
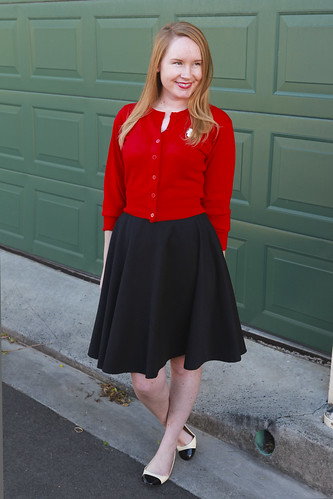
Anyway, let's talk about this dress, and more importantly, the pattern itself...

Vogue 11

Vogue 5

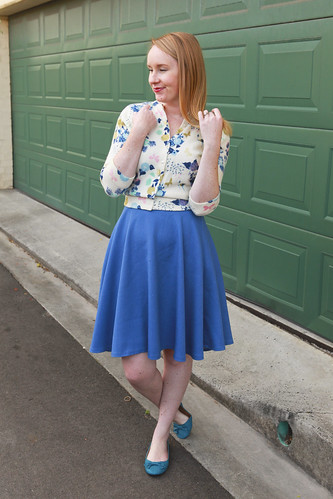
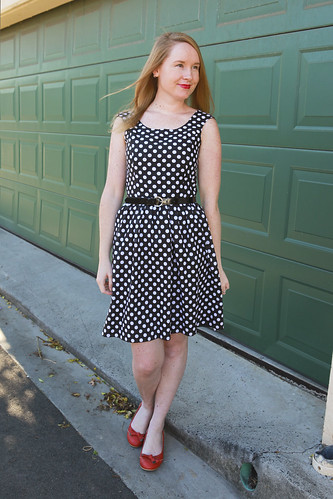
I think there are quite a few of us who have this pattern in our stashes. I've certainly had it for about a year now and was originally inspired to get it when David and I were in town and I saw the exact dress design in a shop window. It was made out of some fabric that I have the vintage twin of (a turquoise polka dot cotton) and it looked so great on the mannequin I bought the pattern that night.

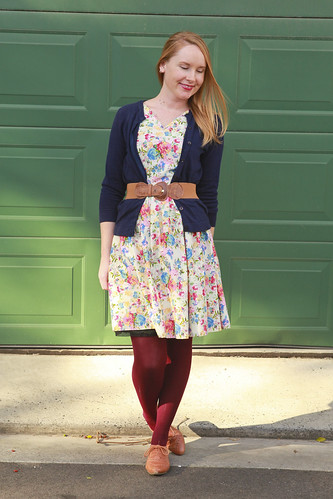
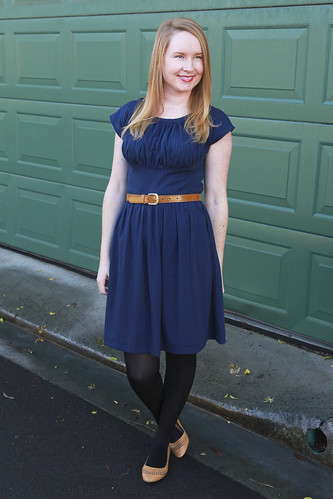
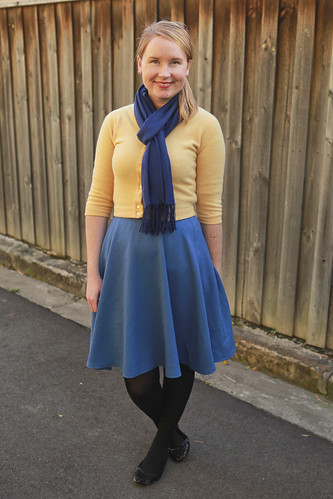
Before I touched my lovely spotty fabric though, I wanted to make it up in a navy cotton knit first for 2 reasons - I wanted to test the pattern and I really wanted to practice sewing with knits a bit more. I finally got my fabric about 2 weeks ago and the dress was added to my list.

Vogue 10

Vogue 4

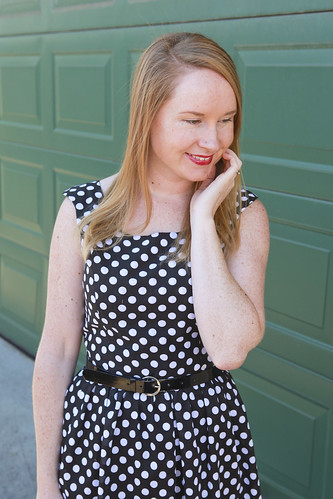
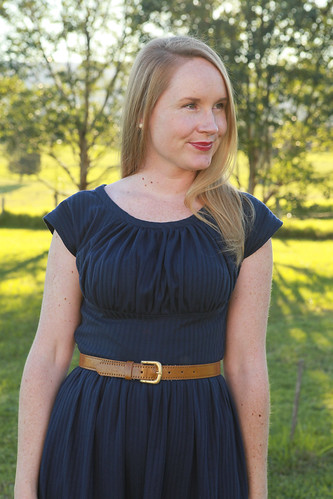
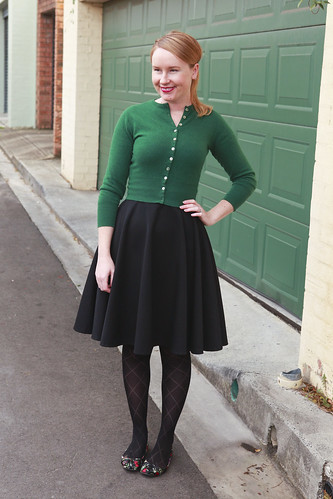
The one thing I would like to point out before I get into the review properly, that I was a bit worried about and that none of the other reviews I had read mentioned, was, for lack of a better term - 'boob-gatherage'. AKA, the gathers in the bust gathering into the recess between and on either side of your boobs leaving you with smooth boobs on top and major pools of fabric all around them.

You know what I'm talking about and it looks weird.  It also doesn't matter how even your gathers are on the top and bottom, their natural inclination is to move to either side of or in-between your bust.

To prevent this, I ended up wearing a slip with mine and tend to wear slips with all my dresses anyway. Doing this, I found that I didn't really have too many issues with boob-gatherage. However, when I was trying it on, mid-construction, without a slip, it wasn't pretty folks. So I would suggest wearing a slip or singlet to prevent the uneven gathers when wearing it. Alternatively, you could draft another pattern piece with no gathers in it, that fits straight across your bust and insert that piece under the gathered bust. I couldn't really be bothered with that though...

Vogue 2

The main construction issue I had with this pattern was getting the sizing right. There are so many conflicting reviews about which size to cut. I ended up reading so many and getting bogged down in them, that I eventually went with my gut and cut 2 sizes smaller in the gathered bust and 1 size smaller all over. I had a lot of fabric and so it wouldn't have been an issue if I had needed to recut any of the pattern pieces had I got the sizing wrong. Luckily I didn't have to worry about that as the dress fit perfectly.

I found that some of the instructions made constructing the dress harder than it needed to be. On the lower bust, they ask you to tuck the top and bottom edges in and then topstitch it to the top bust and skirt. Personally, I think that doing it that way would be so much harder to keep your seams straight and neat and so instead, I stitched them right sides together first and then top stitched. Yes, you are doubling up your stitches, but it ends up looking neater and you've strengthened your bodice this way.

There was also a part about using tear out interfacing on the top gathers. Hmmmm, I ignored that bit.

The only slightly difficult section in the dress is making sure your bust gathers are even to begin with. To ensure the right fit and distribution of gathers, once I had attached the bottom bodice to the lower gathers on the top bodice, I put the incomplete bodice on my dress form. I pinned the shoulders in place where I wanted them to sit and then gathered my top bodice in. I found that this worked really well to make sure I was happy with the amount of gathers in there, that they were evenly distributed and that I liked the where the neckline sat.

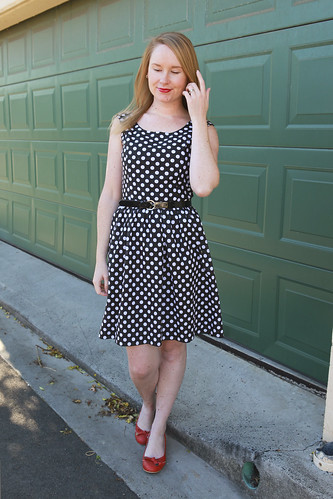
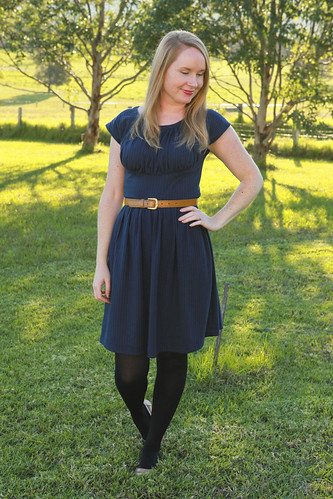
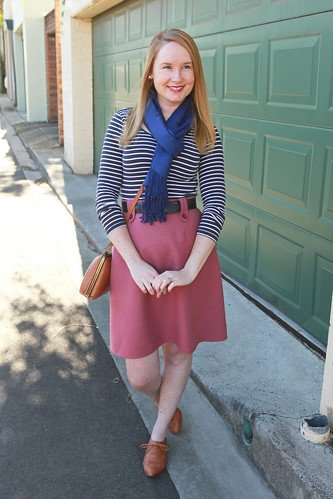
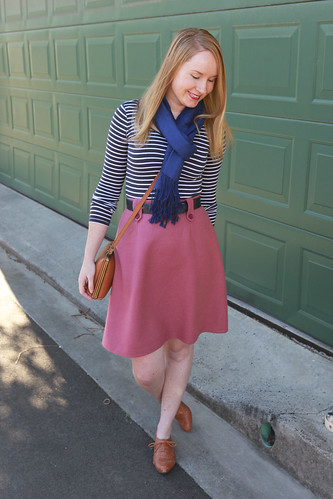
I have to be honest, I didn't really like dress to begin with, but it did grow on me quite quickly. It's so comfortable and it's the perfect travel dress! David and I went away for the weekend and spent a few hours in the car before we took these where we were staying (they had chickens!! Pictures below!) and you wouldn't guess.

I do need to wear a belt with it but I would probably wear one anyway. It was a quick dress to make up and I'm quite sure that another of these is in my sewing future. Vintage turquoise polkadots, here I come!

If you have any questions about the dress please let me know in the comments, I'd be glad to try and answer them for you.

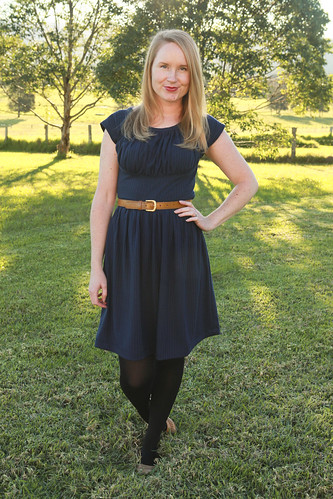
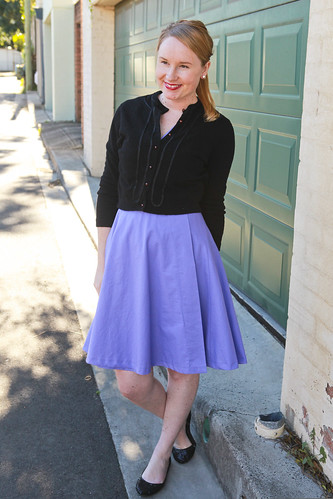
Now, onto the chickens!! This dress is so versatile that you can go from Travelling Movie Star to Chic Farm Girl in one foul (fowl?) swoop :)

Chicken 1

Chicken 2

Chicken 3

Chicken 4

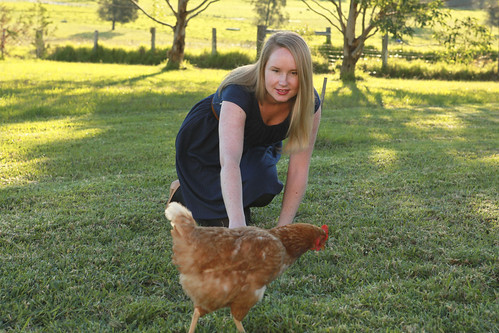
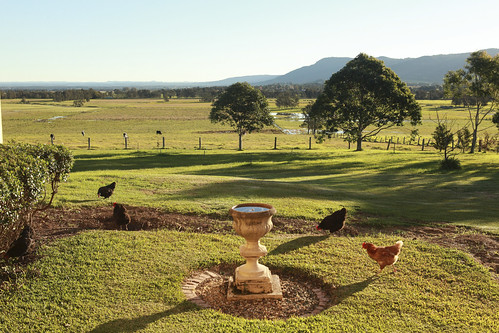
Turns out chickens don't come when they are called. Much like cats...

xx
Jen

Me Made May - Week 4

Monday, May 27, 2013
Wow, I can't believe that there is still almost another whole week to go! I am seriously running out of Me Made outfit ideas folks! I have a feeling it will be circle skirts until the end of the week...

Before we get started though, David and I went to Berry on the weekend for my birthday. Which is tomorrow. So that means that my birthday giveaway ends the day after that. Have you entered yet? Better hop to it!

Day 21 - 
I spent most of the day editing Etsy listings. I didn't get dressed until about midday. And when I did, this is what I wore...

Wearing - Floral Simplicity dress.

21May 2013

Day 22 - 
I really need to find a suitable replacement button for the bottom of this cardigan...

Wearing - self-drafted black circle skirt.

22May 2013 1


22May 2013 3

Day 23 - 
Today David spoke on a panel at the Sydney Writers Festival. The room was packed! So proud.

We took these photos after we had had a celebratory wine or two. It was cold and rainy and this outfit is pretty much the same as day 21 but with a different dress and stockings.

Wearing - Polkadot Billie Jean dress.

23May 2013 3


23May 2013 4

Day 24 - 
Another cold rainy day with only a few visits from the sun throughout. I broke out my new boots for the first time this winter. They aren't my ideal brown boots, but they'll do for now...

Wearing - self-drafted red circle skirt.

24May 2013

Day 25 - 
I finally made Vogue 8728 after I found the perfect knit fabric (the pattern has been sitting in my stash for a year or so...). I'll have a full review of the pattern on my Blog on Wednesday. It's one of those dresses that grew on me (I didn't like it at the start) and I think I'll probably make another.

We also drove down the NSW coast to cute Berry for the weekend and I discovered that this is a great travel dress - comfortable and no wrinkles after a few hours sitting in the car.

25May 2013 1

25May 2013 2

Day 26 - 
Exploring Berry.


26May 2013 1

Day 27 - 
Cleaning and chores day after we disappeared for the weekend.


27May 2013 1

xx
Jen

Tutorial - Make Bunting (with free pattern!)

Friday, May 24, 2013


Whether it's for a birthday, baby shower, wedding or to brighten up a room, bunting is pretty awesome stuff and it's super easy to make at home. Also, I've made you an awesome free downloadable pattern for both circular and triangular bunting!

A special thanks goes to David and his computer skillz for taking my hand drawn patterns and making them look like real patterns.


The pattern is designed to print onto 1 A4 sheet of paper - no random printer resizing should be required.

While I have used the circular pattern in my tutorial, if you choose to use the triangle, the steps are exactly the same.

Supplies:

Steps:

1. Gather your scraps of fabric and iron. Lay your bunting pattern on your fabric scraps.

Note: Get creative when laying out your bunting pattern and use as much of the fabric as you can, you don't need to really worry about grain when making bunting. You'll be surprised at where you can squeeze your pattern onto.


2. Cut your bunting out. As this is reversible bunting, you'll need 2 pieces of fabric for each bunting piece.

Note: Feel free to mix it up and use different fabrics on each side. This works particularly well if you don't have enough of one type of fabric.

3. Right sides together, sew your bunting together leaving the top open.

4. Trim seam allowances and clip corners.

5. Turn bunting inside out and iron. Now you can decide the order of your bunting.

6. Once you've decided on the order, take your bias binding and fold the end in about 1 inch (so you can pin your bunting to the wall, table etc). Place your first piece of bunting on the binding so that the raw top edge sits in the middle of the binding line.

7. Fold the binding over the top raw edge of your bunting and pin in place. Then place the next piece of bunting onto the bias binding - you can either place the bunting right next to each other (as I have done) or leave spaces between each piece.

Keep adding your bunting pieces to your binding until you run out. Then leave another 1inch of folded binding at the end.


8. Starting about 1/4inch in, sew a straight line down your binding. Make sure you catch all of the bunting edges in your binding.


Iron and Ta Da! You have your very own reversible bunting.

I used 10 pieces of circular bunting placed right next to each other ended up with a length of bunting measuring just over 64inches long.

A quick note about the size of your binding - as you can see, I used a really small width of binding for my bunting, and while it looks really cute, I wouldn't recommend it. It was difficult making sure the top bunting edge was securely sewn in. This was some vintage binding that I had had my heart set on using for this purpose ever since I got it though, so if you're like me, you've been warned :)

Let me know if you make any! I'd love to see it :)

xx
Jen
Shop Patterns     .     Instagram     .     Twitter     .     Pinterest

It's Giveaway Time!

Wednesday, May 22, 2013


Competition now closed :) Please check out my Etsy shop for these lovelies.

It's my birthday next Tuesday and to celebrate, I'm giving you a present :)

I've been working hard on my Etsy shop these past few weeks and have gotten it to a point that I'm finally happy with the stock and the photography.

I've turned my embroidery designs into screen printable stencils and have been happily screen printing away in my kitchen ever since. It's so much faster than the embroidery I was originally doing, though I am still offering custom embroidery in my shop.

I have a range of pillow/cushion slips, tote bags and tea towels available. There are three screen printed designs currently in the shop, but I have just put the finishing touches onto a cat design that will be available hopefully next week sometime.

As I had spare fabric remaining from previous projects, I ended up changing the backing out on the screen printed versions of my cushions - can anyone guess which projects they are left over from?


My screen printing method was mostly trial and error in the beginning. I have done it before, but it was years ago, so I was going off what I could remember and thankfully, they turned out quite amazingly well!

Are any of you interested in hearing a little more about screen printing? It's a great way to customise fabric for your garments and you don't really need much to start with. If you are interested in hearing a little more about how I did my screen printing, let me know in the comments and I can do a small 'beginners screen printing' series.

WIN!!

In honor of my birthday next week, I am giving away one tote bag to a lucky winner and one tea towel to another winner - the winners get to choose the design they prefer.

All you need to do is:

Visit my shop and then leave me a comment on this post telling me what you would like the most - a tea towel or a tote bag, and your preferred design (rabbit, mouse or bird).

Please leave me your email address as well so I can get in touch with you easily (feel free to email it to me once you've left your comment so it's not out on the inter webz for all to see - jenniferlauren.is@gmail.com)

I will ship any where in the world!

I will announce the winners a week from today (Wednesday 29th May). Please feel free to share the give away anywhere you feel appropriate as well :)

Good luck!!

xx
Jen

Me Made May - Week 3

Monday, May 20, 2013
Another Me Made week down!

I don't know about any of you, but it's starting to get harder to get dressed in the morning. I find myself checking my instagram far too often to figure out if I've already worn a combination before or to make sure that there have been sufficient days in between before I can wear the same piece again.

It's been great for forcing me to think a little more creatively about what I wear each day, to pull out those Me Mades that don't get any wear and to not just throw on the same old thing each day. But it's definitely becoming a challenge.

All I can say is, thank goodness for cardigans and their ability to transform the same outfit into something new.

Day 14 - 
It's started to get much cooler in the evenings here now. Today I invented a new fashion - pj's under dresses. Comfy and warm!

Wearing - Polka Dot Billie Jean

14May 2013 1


Day 15 -
I can't even remember what I did that day... but I really like those shoes.

Wearing - Self-drafted Grey Circle Skirt

15May 2013 1

Day 16 - 
Today you got a bonus glasses shot. No, they are not 'for show'. I wear them all day every day so I can see you :)

Wearing - Stripes and Stripes Dress

16May 2013 1

16May 2013 3

Day 17 -
I did baking today. I made a gluten free version of these. Yum.

If you plan to make them, put chocolate chips into the muffin batter as well. You won't regret it. Promise.

Wearing - Self-drafted Black Circle Skirt

17May 2013 2

Day 18 - 
It's Saturday! We went to look at art and made an impromptu stop at the Australian Museum. They have snakes and lizards there. Awesome.

Wearing - 60's McCalls Wool Skirt

18May 2013 2

18May 2013 1

Day 19 - 
Mostly couldn't be bothered getting dressed today. But I did get a lot done. Watch out for a bunting tutorial coming up on the blog this Friday (with a free downloadable pattern I drafted!).

Wearing - Vogue Violet Wrap Dress

19May 2013 1


Day 20 - 
Ahhhh Monday, we meet again.

Wearing - Self-drafted Blue Circle Skirt

20May 2013 1

xx
Jen
 

Tailors Ham 101

Friday, May 17, 2013


~ Unfortunately the pattern I used for this project has now disappeared along with the website. I have made a free Tailor's Ham pattern for you though, please head over here to download it ~


You guys - I made ham!

Okay, I made a tailors ham. But it was still delicious to make. Simple and I used up some fabric scraps to boot.

I used this free pattern from Chance of Rain (bonus, it also has a kidney shaped ham and a sleeve roll, all in one) and also mostly followed her tutorial.

Since I didn't have any sawdust to hand, I did some research on whether I could just use poly-fill, and found that while you can, if you want to be fancy and do it like the pro's, sawdust is the stuffing of choice. Fabric scraps are widely regarded to be just as good, but your ham may need re-stuffing in a few years since they squash down over time (have any of you had any experience with this?).

I also ended up using 5 layers of fabric in total. The inner layer is calico/muslin, the bottom layer is a scrap of vintage rosey pink wool left over from this skirt and the top is a scrap of floral fabric left over from this dress, as well as the underlining from it. The scrap I used still had the under lining attached so I just went with it and thought that it would give some extra smoothness to the finished ham.


I managed to find my sawdust from a pet shop, but the smallest bag they had was 1 kilo. I still have enough to make a sleeve roll and a several more hams from it I think.

Also, just a quick note when stuffing your ham with sawdust, it's best to do it outside. I ended up with it all over the courtyard, myself and Monty, who was innocently snoozing in the sun. To be fair though, it was windy...

xx
Jen
Shop Patterns     .     Instagram     .     Newsletter      .     Facebook    .     Pinterest   .   Podcast

Patterns and Spots

Wednesday, May 15, 2013
So, something quite exciting happened a few weeks ago. I was asked to be a pattern tester for a new indie pattern company that Abby was starting called Blue Ginger Doll. I was quite chuffed to be asked really. I've never done any pattern testing before (except for my own adventures in pattern drafting) and so I jumped at the opportunity to be involved.

I received a lovely big package in the post a few weeks later that turned out to be the pattern for Abby's first dress, the Billie Jean.

14May 2013 2

14May 2013 1


It's a truly lovely pattern to work with. I didn't really need to make any alterations besides the ones I normally have to make to most patterns.

I did end up pinching a bit of excess out of the neckline though, probably about 3cm all up. The dress straps are designed to sit off the shoulder but I wanted to be able to wear the dress as an 'every day' dress and so needed to be able to wear a bra without the straps showing.

This is really very easy to do - simply cut out the front pattern piece in a muslin, place it on yourself or your dress form and pin the shoulder straps where you would like them to sit. Pinch out the excess on the neckline evenly on both sides, iron the excess down so that you have a flat pattern piece and redraw. Do the same for the back pattern piece so that the shoulder straps line up. You will need to slightly true up your pattern piece around the neckline after that, but it's really very minimal.

14May 2013 4

14May 2013 3

14May 2013 5

I made version 2 of the dress but made the skirt less full. My version is made from a light cotton black and white polka dot fabric and is lined in the same fabric.

The Billie Jean dress is Abby's first pattern and is available for pre-sale at the moment in both downloadable pdf and paper variations. Check out her website for other variations of the dress, you'll see that it's really a great pattern for mixing and matching different fabrics and styles.

xx
Jen

Auto Post Signature

Auto Post  Signature