Image Slider

Showing posts with label Sewing. Show all posts

The Sorrel Dress is coming...

Sunday, July 28, 2019

It's nearly time for the official Sorrel Dress pattern release! Woohoo!

Sorrel will be available in both paper and digital format. If you'd like me to pop into your inbox and let you know when it's ready (before anyone else and with a cheeky wee discount!) just sign up to my newsletter here before 8am Tuesday 30th July NZDT.

xx
J
Shop Patterns     .     Instagram     .     Newsletter      .     Facebook    .     Pinterest    .    Podcast

Me Made May 2018!

Tuesday, May 1, 2018

I've been caught up in last minute Pippi Pinafore preparations (the early bird newsletter went out this morning! Wow, I'm over whelmed by the support!) as well as trying to register for KAN (Knit August Nights) and making my Me Made May pledge had completely slipped my mind.

It's actually the first of May here today and I'm in an Ivy pinafore and pair of Nixie Briefs as I type.

I actually pretty much only wear Me Made garments these days, but I've realised that I've been reaching for the same combinations over the last few months (an Ivy paired with a Gable or Ostara top and a cardigan) and while it's such a comfortable outfit, I really need to start getting a little more inventive with my everyday handmade outfits.

It's not like I have any lack of choice - this year is the first year that I'll have handmade underwear to add into the mix, so the only things I haven't made that I wear on a daily basis in my wardrobe are tights, socks, bras and shoes. And I'm pretty proud of that little fact.

I do want to focus a little more on my knitting this month though (winter is looming...), completing another knitted garment is high on my list and should be very achievable - I have a cardigan for Oscar that is halfway finished, a nearly completed Wainthropp that is just awaiting some button band stabilisation (and buttons) and my Arboreal jumper is slowly taking shape (well, the fairisle is anyway...).

So, onto my pledge!

I, Jen of Jennifer Lauren Handmade and @jenniferlaurenhandmade on instagram, sign up as a participant of Me Made May '18. I will wear me made clothing everyday of the month and will get more creative with my daily handmade outfit combinations.

I'll also finish at least one knitting WIP and will document my outfits as much as possible throughout the month. I will post the occasional round up on my blog and post updates on my instagram account.

Are you signing up for Me Made May?

xx
J
Shop Patterns     .     Instagram     .     Newsletter      .     Facebook    .     Pinterest    .    Podcast

Black Ivy...

Wednesday, October 12, 2016
Wow, thank you all SO MUCH for the Ivy love this past week! For purchasing, for the amazing comments and emails, the convo's and the likes. I'm so so happy you like it and I can't wait to see more of them popping up around the internets.

Today I wanted to show you one of the wearable muslins I made for View 2 of the Ivy pinafore. I actually have a podcast coming where you can see this exact outfit in action (because when an outfit works, it is therefore allowed to be worn multiple times in one week, right...?! Actually, to be fair, these photos were taken a week and a half before I filmed the podcast, so, you know...).


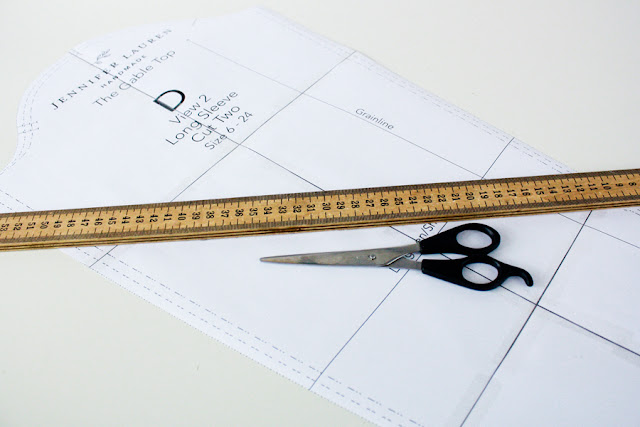
I make a lot of muslins when I'm drafting patterns - some wearable, some not so much. I ended up with three wearable muslins at the end of the drafting phase for View 2, the first made from a brown corduroy, the second a rosey, pink-y vintage wool and then this one.

This version has the tiniest issue at the back with some excess fabric and I also ended up adjusting the darts on the bust ever so slightly on the final pattern. These adjustments are so small though, that walking down the street, I doubt anyone would notice them at all.

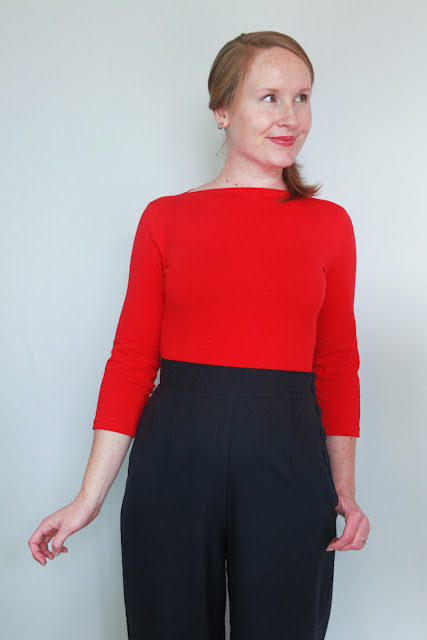
It's made in a navy pinwale corduroy (not that you'd ever guess it was navy, it looks black, even in real life!) and I went for contrasting white top-stitching and some vintage metal buttons (with clouds stamped around the border! Oscar is endlessly fascinated with them). The straps are non-functional on this version, and that was mainly because I couldn't be bothered putting in button holes - the dress easily pops over your head, making it an even faster make for those of you wanting some instant gratification sewing.


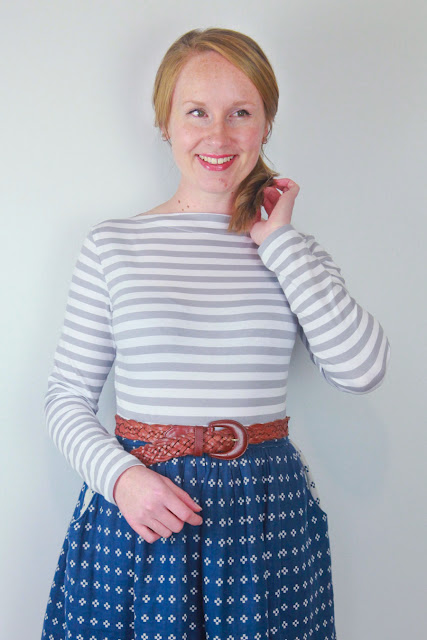
I'm wearing it here paired with a long sleeved Gable top made with fabric that might look familiar? Originally, I was planning to make the long sleeved sample for Gable from this red and white striped knit, but as luck would have it, I got an end-of-bolt and therefore had enough to make a short and a long sleeved Gable! Woohoo! I added contrast elbow patches (made from the same fabric as my 3/4 sleeve Gable Top) and there will be a free pattern available for you first thing next week, just in case you fancy adding an elbow patch (or two - who's counting) onto your Gable top.

FYI about the balloon prop. This was totally unplanned, even though I know it looks very planned. David had taken Oscar out the morning we took these photos and someone very kindly gave him this balloon. The only problem? Oscar seems to have a love/hate relationship with balloons. He loves them, wants to pick them all up and hug them AND THEN bursts into tears when holding them. Real, achy, puddles-of-tears-hide-the-balloon-quick, kind of tears. We aren't sure what the exact issue is, one has never popped in front of him nor has he had a bad experience with them, but we now officially avoid balloons. Please, no balloons!

When David got home, he threw the balloon into my sewing room & shut the door.  Once Oscar was down for his nap, we snuck into my sewing room to take these photos and David casually mentioned I should pose with it. So I did. Couldn't resist. It was too perfect.

Thanks Oscar ;) And thank you guys again...

xx
J
Shop Patterns     .     Instagram     .     Newsletter      .     Facebook    .     Pinterest   .   Podcast

PS) Just a reminder that there's only one more week left to purchase your Ivy Pinafore and Gable Top bundle! Quick, quick!!

The Gable Top Tutorial Series - A 3/4 or Bracelet Length Sleeve Adjustment

Sunday, September 25, 2016


This is probably just about the easiest adjustment you could make to your Gable Top (besides doing nothing at all, of course). Bracelet or 3/4 length sleeves will give you an even more elegant look for work and evening wear, plus, if you're a vintage gal, they'll also fit rather nicely into your wardrobe. They also work well for transitioning into different seasons - long enough to keep you warm, short enough to keep you cool.

Bracelet length sleeves are slightly longer than 3/4 sleeves - they tend to sit just above the wrist, whereas 3/4 sleeves will sit about half-way up your forearm (like they do on me in the pictures above). You could also opt to make your 3/4 sleeve shorter, by having it stop just after your elbow.

These are subtle variations, but you'd be surprised at how different they can make your finished garment look, so make sure you pop on a long sleeved Gable and play with the different lengths by rolling your sleeves up to different heights. That'll give you a good idea of how much sleeve you might want to remove. Once you've decided, make a note of that measurement.

Now, let's get adjusting!

You'll need -
Steps -

1. Decide where you'd like your finished sleeve to sit - if you'd like a slightly shorter 3/4 sleeve (finishing on your forearm, just after the elbow), you can easily use the sleeve pattern piece from View 3 with no adjustments. Simply leave the cuff off and hem using the seam allowance included in the pattern piece.

If you'd like a longer 3/4 or bracelet length sleeve, use the long sleeve pattern piece from View 2.


2. I went for a standard 3/4 sleeve on the samples above, so used the View 2 sleeve pattern piece. I measured up 15.5cm from the bottom sleeve hem on a size 10 to get the sleeve length pictured.

Once you've decided on a length, add your 1cm hem seam allowance to the bottom of that and draw in your new hem line (in pink below). My line was drawn in at 14.5cm up from the bottom to include the seam allowance.

3. Cut your pattern piece along the line you drew in step 2.

4. The last thing we want to do for a perfect pattern piece is to shape the hem seam allowance for a snug fit when folded back into the sleeve. To do this, fold your seam allowance up.

Take your scrap paper and at either side of the seam allowance, use the paper to increase the sides of your seam so that they match up with the angle of the sleeve (the little pink triangles on the photo below). Your hem seam allowance will then fit perfectly back into your sleeve when turned up.

5. Stitch in place using the steps in your Gable Top instruction booklet, and TA DA! Cute little 3/4 sleeves. Now, where are my circle skirts?


If you make a 3/4 or bracelet sleeve Gable, I'd love to see them. Leave me a comment, send me an email or tag me on instagram!

xx
J

Shop Patterns     .     Instagram     .     Newsletter      .     Facebook    .     Pinterest   .   Podcast

ps) The Ivy Pinafore dress pattern is nearly here! Yay!! Make sure you sign up to my newsletter to be the first to find out when it's released and for your subscriber only discount.

Video! Adjusting the Neckline of your Gable Top

Monday, September 12, 2016
Hey everyone!

So, er, I really liked making and sharing my first video with you guys last week, to the point that I made a second one showing you how to adjust the neckline of your Gable Top (hint: it's really easy). It's so much easier to show you in video format than a series of pictures, so, here you go...


Notes -
  • I forgot to mention that after I eased in my seam allowance and pinned down my neckline (and then turned off the camera!) that you should press your neckline at this stage before stitching down. It'll really help to make sure your neckline is smooth. I did do this after I turned the camera off.
  • If you do pop a basting stitch into your neckline to gather the excess ease, you'll want to take it out once your neckline has been stitched down. 
Let me know what you think and if you have any questions :)

xx
J

ps) Sign up to my newsletter to keep up with new videos AND for sneaky peeks at my newest pattern, coming soon!

Shop Patterns     .     Instagram     .     Newsletter      .     Facebook    .     Pinterest   .   Podcast

Introducing The Gable Top - A Knit Top Sewing Pattern

Wednesday, August 3, 2016

With a classic 50s-inspired true slash neckline, a long-line body for extra comfort and three different sleeve options, The Gable Top will become your new favourite go-to knit top pattern.

Gable is perfect for wearing all year round – layered with dresses and cardigans on chilly mornings or worn on its own with 3/4 skinny jeans or a high waisted skirt à la Audrey in spring. Gable is a stylish weekend basic that can be easily dressed up and added to your office outfit rotation.

Made with comfy stretch knits, Gable is a quick and easy sew that doesn't use much fabric and turns out perfectly every time. A modern take on a timeless and elegant basic.


The idea for Gable has been floating around in my head for a long time. I love knit tops and since releasing Bronte all that time ago, I knew I needed to revisit the world of knits again. They're so easy, so quick and so satisfying to make and wear.

Gable is a true slash-neckline top, which basically means it sits at a 90-degree angle straight across the neckline from the inner shoulders. If you love the style, but aren't a fan of necklines sitting up so high, don't worry, I talk about how to alter the height of the neckline in the pattern instructions and will be doing a little tutorial for you as well.

Speaking of tutorials, I'll be popping a few up on the ol' blog over the coming weeks – want an even more retro-style Gable? I'll show you how to alter the pattern for 3/4 sleeves (it's a super easy adjustment!).  Not sure about sewing with knits? I have lots of in-depth posts already about knit fabrics and sewing them on your sewing machine (as I did with all of my Gable tops!) but I'll be writing a bit more about the process so that you can feel relaxed knowing that you'll come out with a beautiful garment at the end.


Gable is really quick to make, for both newbies and advanced seamstresses alike. Plus, she's elegant as heck you guys! You can't put one on and not feel a little like you tried to look nice that day (even though you really didn't because there are crumbs all over the floor, you have greasy hair and it's freezing outside so it's a pj bottom and slippers kinda day). I have a black one that I wear all the time; in fact, I went out on Saturday night for the first time since before Oscar was born (for a crazy wild night of dessert with a lovely bunch of ladies) and it was a perfect choice with a wool Felicity skirt and the freezing temperatures of the weekend (we've had snow! And more is forecast for the end of the week).

If you have any questions or anything specific you'd like covered in a tutorial, do let me know. Otherwise, I can't wait to see your Gable tops!

xx
J
Shop Patterns     .     Instagram     .     Newsletter      .     Facebook    .     Pinterest   .   Podcast

PS) Making all of my samples from stripes was a complete accident, but I may also have made a black and cream striped one and a red and white long sleeve striped one as well. Oops...

New Sewing Pattern Coming Soon - The Gable Top

Friday, July 29, 2016

I've been a bit MIA, mostly because I've been putting the finishing touches on my next pattern, The Gable Top, which is coming soon...


Gable is a modern take on an elegant classic 50's design - with 3 seasonal variations suitable for all seasons and made with comfy knits, Gable is a beautiful and quick project, that'll become your new go-to knit top pattern.

See you soon!

xx
J
Shop Patterns     .     Instagram     .     Newsletter      .     Facebook    .     Pinterest   .   Podcast

Perfect French Seams - The Hunter Tank Sewing Series

Friday, July 8, 2016

I love French Seams and though I did a tutorial a few years ago, I thought since releasing The Hunter Tank, that it was the perfect time for a bit of a re-fresh.

The Hunter Tank can be almost completely made up with French Seams (except for the centre front) and it's the perfect little pattern to try the technique on if you're new to it.

French Seams are the best kind of seam to use on delicate, light and sheer fabrics, just what The Hunter Tank calls for.  They enclose the raw edge of a seam and produce a beautiful finish on the inside and out, and they aren't hard at all! Let me show you...

You'll need - 


Steps - 

1. Wrong sides together, place a line of stitching 5mm (or 1/4") away from the seam allowance.


2. Press your seam allowances open (use a Tailor's Ham to keep the light angles on the centre back seam of your Hunter Tank in place).


3. Fold your seam in half, right sides together, along your stitched edge and press.


4. Place a line of stitching along the seam allowance again, this time 10mm (3/8") away from the edge. Press and marvel at your beautiful finished French Seam.


Ahhhh, look at how pretty that is, and so easy to boot! You can do a French Seam with any amount of seam allowance really, just make sure both seams equal the seam allowance that your pattern calls for (15mm for Hunter). And make sure your first seam is smaller than the second seam, or trim your first seam down before stitching in your second seam.

French seams can be used on The Hunter Tank for the back centre seam, side seams and shoulder seams.

Have you tried French Seams? Will you give them a go now that you know how easy they are?

xx
J
Shop Patterns     .     Instagram     .     Newsletter      .     Facebook    .     Pinterest   .   Podcast

Perfecting the Centre Seam - The Hunter Tank Sewing Series

Friday, July 1, 2016
Welcome to the first of The Hunter Tank Sewing Tutorial Series. Today we're going to be looking at getting the perfect centre seam. It's pretty straight forward really, but let's get started shall we?

You'll need - 


Steps -
1. Sew your centre front seam together, right sides facing. Press your seam open.

2. Because there is a 2cm seam allowance included in this particular seam, place a set of basting stitches all the way down the middle of the seam allowance by stitching 1cm (3/8") away from the raw edge, providing you with a guide line for the next stage.

Do this to both sides of this seam allowance.


3. Using your basting stitches as a guide, press your seam allowance in half and tuck your raw edge under.

Because of the light curves in this seam on the Hunter Tank, I like to press it using a Tailor's Ham to help keep the subtle shaping.

4. Press, then secure with a line of stitching as close to the edge as you can get it. Press again and voila, a perfect centre seam every time.


Why not try some contrast stitching down your centre seam next time you're making a Hunter Tank? Have you tried this?

xx
J
Shop Patterns     .     Instagram     .     Newsletter      .     Facebook    .     Pinterest   .   Podcast

An Autumn Afternoon...

Monday, June 6, 2016


I've just realised that it's been an age since I did one of these handmade wardrobe showy-offy blog thingys! I guess I have to try to get back into the habit of taking photos a bit more :) 

We took these back in April on a warm autumn afternoon stroll in a beautiful corner not far from where we live. We're pretty lucky.

This version of the Afternoon Shift Dress is made from a Japanese cotton lawn that I'd had in my stash for a few months. I made View 4 with the pointed cross-over neckline and elasticated back shaping.

I've since removed that lovely vintage button though after some little fingers got a penchant for pulling and pulling at it every time I wore it. And I opted to machine stitch the entire neckline down on this version too, instead of hand-stitching like I normally do, because it felt sturdier and a little more up to dealing with the challenges of those previously mentioned little fingers. 

I've come to the realisation that baby-proofing necklines is a must-do these days, not so much a nice-to-do. And so due to the baby-proofing success of machine stitching on this version, I decided to go back and machine stitch down all of my previous versions of the shift and blouse. I'm giving it two thumbs up so far you guys.

This particular Afternoon Shift dress has become a fairly consistent staple over in my neck of the woods throughout autumn. Though, it's got a new contender for my heart at the moment - a gorgeous snuggly plaid flannel one (you may have seen the sneaky preview during Me Made May). It's seriously like wearing a nighty, but no one has a clue. I'm very down with wearing secret PJ's. Proper photos to come.

Oh, and don't forget, if you were thinking of buying the Indie Pattern Month sewing pattern bundle that The Hunter Tank is in, it finishes in 2 days! The Basic Bundle gets you over 40% off the RRP of all three patterns combined and the Extended Bundle gets you over 50% off the RRP of all six patterns. Woot! Bargain indeed.

Talk soon,

xx
J
Shop Patterns     .     Instagram     .     Newsletter      .     Facebook    .     Pinterest   .   Podcast

Introducing The Hunter Tank, A New Summer Sewing Pattern

Wednesday, May 4, 2016

Hello everyone!

Today, I'd like to introduce you to my brand new pattern, The Hunter Tank. It's just in time for summer up there and just in time for winter down here :)

The bias cut Hunter Tank is designed to sit at your natural waist, skimming your curves with the lightest touch, giving you definition where it's needed, while keeping you cool and comfortable.

Wear it to the beach for a casual look, pair it with a circle skirt for a vintage vibe or wear it with jeans for a modern look — The Hunter Tank is your ultimate summer top, ready to go when you are.


The Hunter Tank has been a work in progress since late last year - I really found my summer wardrobe lacking in separates that were versatile, lightweight and flattering. I couldn't put my finger on quite what exactly that was and so I kept looking through my wardrobe, just in case something I hadn't seen last time had magically appeared. Or, you know, Narnia.

Narnia didn't appear to be lurking in my wardrobe, but the idea for Hunter popped into my head one day while trying to find a nice flattering and comfortable cover up for a sundress I wanted to wear (maternity bras are not the most beautiful things ever designed). Perfect, a pattern that you can make to wear on it's own, or as a cover up for when you need a little extra, er, coverage.

So, I'm really excited to share Hunter with you, and I hope you'll enjoy it as much as I have.  


FEATURES:

  • choice of wide or narrow shoulders
  • an optional pocket
  • detail stitching
  • a lovely wee rolled hem (with easy instructions on how to do it without a rolled hem foot)
  • bias bound neckline and armscye finishes (pattern pieces included!).
You can make Hunter in a huge range of fabrics, from quilting cottons for a crisper look, to lawns and linens for everyday to crepe de chine, georgette and silks for a stunning evening cover up over strappy dresses and playsuits.

Quick and easy, with beautiful detail and clean drafting for a gorgeous fit, Hunter is a modern nod to classic vintage attire.

The Hunter Tank Pattern - Available Here!

I'll be posting a few Hunter Tank tutorials during June, including how you can get a rolled hem without a rolled hem foot (it's easier and neater than you might think!!). 

I'm so proud of this pattern, it's my first brand new pattern back since having Oscar and I think it's such a sweet little top (er, I might be biased there...), so the question is, what do you think?!?

xx
J
Shop Patterns     .     Instagram     .     Newsletter      .     Facebook    .     Pinterest   .   Podcast

ps) The chambray Hunter Tank is worn with a Felicity Dress Skirt.

Auto Post Signature

Auto Post  Signature