Image Slider

Showing posts with label Winter Sewing. Show all posts

The Dandelion PJ's...

Friday, July 24, 2015

These wee pj pants, along with my Maternity Bronte top, were the last things I managed to stitch up before Oscar was born - and thank goodness for that since I've literally spent the majority of the last 9 weeks in pj's. 

I figure if I'm not leaving the house that day, since I'm spending most of the time either breast feeding or catching up on sleep, getting dressed in anything but pj pants is a waste of any precious spare time. Add to that the fact that one of my RTW pairs has officially bit the dust (think big ol' hole in your pj butt - does that mean I spend too long sitting down?) means that these cute jammies were a good investment in pre-Oscar sewing time and they've been getting a tonne of wear ever since.


They are technically a wearable muslin since I drafted them up really quickly and then cut straight into my fabric. Normally I'd do a bunch of testing before cutting into my actual fabric, but at the time, I just wanted a new pair of pj bottoms and since I was quite pregnant, any time spent fitting them to me would have been a bit of a waste considering my shape was vastly different to what it is without a baby. Plus, I was at that stage where I just had to sew when I had the energy, otherwise I'd end up doing nothing.


For a quick draft, I think they're pretty spot on. I really liked the fit around the back when I was pregnant and knew that if I hadn't had to wear them so low at the front due to my bump, they would probably fit nicely there as well since they looked similar to how my RTW pairs looked at that stage. Now that I am post bump, I'm happy to report that they look pretty good at the front now too :)

I did end up having to stitch an extra wedge onto the top of the waist band, mainly at the back because I hadn't made them quite big enough there, but the fabric is forgiving with it's print and since it's gathered with elastic, I don't really notice it much at all. 


They are made from a lovely soft flannel fabric, and while I did pre-wash it, it's not at that buttery soft stage flannel pj's tend to get after a little bit of wearing and washing in, but they will hopefully only get better as time goes on.

I have some more fun flannel with little bunnies on it that I'm going to make another pair from now that the bump has gone and I can see that there are no major fit issues to get around. I added piping to the bottoms using this tutorial I posted an age ago and will do the same with the next lot. I'm also thinking I might pop in a faux fly-front, just because I can and possibly pockets. Pockets on everything!


Right, off to snuggle my baby in my snuggly pj pants on this cold blustery winter day. Hope you're staying warm (or cool if you're basking in some summer time warmth!).

xx
J

Me Made May '14 Giveaway #2

Thursday, May 8, 2014
*Competition is now closed*

Okay guys, here it is, giveaway number Two for Me Made May '14!


Caitlan at Indie Stitches is generously giving away one pattern of the winners choice with shipping included for anywhere in the world. Woohoo!

Indie Stitches has such a lovely selection of patterns all by independent designers. In fact, after reading her post on the Lola dress,  I'm thinking one wouldn't go amiss round these parts (especially considering my last post!).


She has also just started stocking Thread Theory, and I've promised David a Newcastle Cardigan (can you believe it'll be the first thing I've ever made him? I'm such a mean and selfish sewer!!).


To enter to win, head on over to Indie Stitches, peruse her wares and then let me know in the comments which pattern you'd choose.

The giveaway is open to everyone, not just #MMM14 participants, and closes in a week at 12am Thursday 15 May 2014 (NZ time!).

So, what's missing in your handmade wardrobe that you think could be solved with an Indie Stitches pattern?

xx
J

Autumn Dresses and Giveaways...

Monday, April 14, 2014
In an attempt to break up all the Afternoon Blouse spam on my blog lately, I thought I should show off a newly finished sewing project and perhaps do a little sneaky giveaway while I was at it.

It has officially started getting cold here - the days are shorter, the leaves are turning, I've pulled out my knitting again and I can feel myself leaning towards darker colours and snuggly, comfortable outfits that work well with tights and a cardigan. Cue, Winifred (and my smurf legs!).


Winifred is Abby's newest pattern - a cute variation on a shirt waist dress, except that this one is probably way faster to make up than any shirtwaist dress I've ever seen. I do love the classic button-up version, but they can take a while, what with all them buttons. Winifred however, has no fastenings what so ever, you just pop her on over your head, throw on your favourite coloured tights and you're ready to go play in the autumn leaves.

So, what's the trick? She has a comfortable elasticated waist at the back. Perfect for expanding tummies around lunch and dinner time (and Easter time, let's be honest here. I've probably already eaten my fair share of chocolate eggs over the last few weeks).


I made my Winnie (as Caitlan and I have affectionately called her) from a chocolate brown suiting cotton I picked up from my favourite charity haunt a few weeks ago (I got a huge roll of it for about $5). The fabric drapes beautifully but has a lovely weight which makes it the perfect fabric for my autumn version of Winnie.


There are two things I'd watch out for with this pattern though, both of which tripped me up when I was making it. The first are the sizings on the back. I really had no idea what size waist I should be cutting out because the sizings listed are big. I ended up cutting out a straight size 8 because that was my bust size (and I figured that my waist is really nowhere near 34 inches which is the size that corresponds to the 35inch bust, even after all those easter eggs).

Erm, wrong! The dress fit, but only because of the bigger back piece (due to the elastic). Instead of having side seams though, the front was so small around my waist and hips that I had front/hip seams! I gather the 34 inch waist is actually the finished garment waist size (?), sans elastic, but not taking into account that the front is fitted and doesn't have any elastic... So, I ended up cutting a second front and graded out one size at the waist and two at the hips to accomodate my big ol' lower half.

Even now, the skirt side seams are sitting forward a bit but not nearly as much as they were in my previous attempt. With the drape of the skirt, I kinda think they look like extra pleats, so I'm going with it. And I actually quite like it.

So, the lesson here? Measure your pattern pieces, and email Abby if you're not sure (as I didn't!!).

The second thing I'd point out is the collar instructions. I found them a tiny bit confusing at the end when it comes time to finishing the inside raw edges of the collar. Basically it's up to you how you finish it, but if you've never attached a collar before, it could leave you feeling a little puzzled. I would consider myself reasonably okay at sewing, but even then, I muddled through a bit (I've never actually inserted a collar before though). I still don't know if it's quite right quite, I inspected one of David's shirts to see how it was done and I've given mine a grade of 'passable'. I ended up folding the bottom raw edges of the back of the collar under and hand stitched them in place for a clean inside finish.

But even with these things, I'll definitely still be wearing my Winnie a tonne over winter.


Other small changes I made were to use a smaller width elastic and binding on the back (13mm binding and 7mm elastic), lower the placement of the back elastic by an inch and leave off the faux belt, lower the bottom of the darts by 1/4inch and lengthen the darts by about 1/2inch all up. I top stitched around the entire collar and neckline and opted to sew in my sleeve hems flat before sewing up the side seams. I also took my hem up by about 2 inches to a length I prefer to wear and for my next Winnie, I'll lower the neckline opening as well, as it's a tiny bit hard to get my head through as it currently is (it's no biggie though, I just can't do my hair before I get dressed!).

*Thank you all so much for entering, the competition is now closed*

Win your own Winnie!

I'll definitely be making another Winnie soon, and you can too! To celebrate the release of Winifred, Indie Stitches and I are giving away a copy of the pattern to one of you lucky folk! All you have to do to enter the giveaway is leave a comment below and you're entered.

The competition is open world wide and will be drawn at random in two weeks time (Monday 28th April NZ time). The winner will be contacted by email.

Stay tuned this week for more Afternoon Blouse fun :)

xx
Jen

One Pattern Seven Bloggers - The Big Reveal

Monday, September 2, 2013
We've come to the end of the second One Pattern Seven Bloggers challenge and it's now time to reveal our finished Macarons.

Macaron10

Macaron13

Macaron19

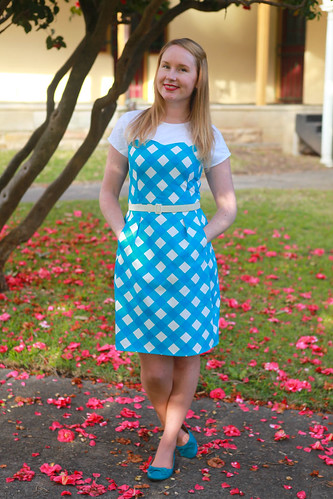
First off, can we talk about the pockets? In-pleat pockets are officially my favourite kind of pocket! My mind is blown as to why I have never used them before, as it is, I'm quite sure I see a few Macaron skirts in my future. As some of the other challenge participants noted, the skirt is much more of a tulip shape than the pattern pictures make out and to be honest, that's why I love it. The soft pleats are very flattering across your tummy when you've had a big lunch and they hide the deep pockets so well, you could keep all number of curiosities in them and no one would know.

Macaron12

Macaron9

Macaron8

For this version, I moved the side zip to the centre back - something I tend to do for almost everything if I can get away with it. I'm one of these people who does their hair before they get dressed and prefer to step into a dress as opposed to pull it on over my head. I also inserted it using my preferred zip insertion method, the lapped zipper.

I underlined the yolk/sleeve fabric with a plain white cotton to stop it being as see through and replaced the neck facing with white bias binding that I hand stitched to the underlining.

Macaron27

Macaron28

Macaron25

Macaron18

I also chose to omit the bodice waist band as I tend to wear belts with almost everything. Though before I had even thought of doing that, I had to quite drastically lengthen the main bodice piece (even if I was going to keep the waist band!). I'm now officially confused as to whether I'm long waisted, short waisted or just average waisted as with almost every pattern I've made, I have to make one of the above mentioned alterations to my waist length. Any one care to fill me in on how I decide whether I'm short, long or average in the waist-length department?

Macaron6

Macaron14

Macaron22

Overall, I found this pattern lovely to work with. The combination of fabrics you could choose for the dress are endless as well as the number of different changes you could make (Kat made a peplum top from hers!!). The instructions are easy to follow and the dress doesn't use a lot of fabric. In fact, I loved making this pattern so much that I hopped straight back to it and made a second Macaron for the Sew Weekly Reunion Challenge right after I was done with this first version.

But, let's not forget that amazing giveaway we promised when we first announced the Challenge. The prizes have been drawn but firstly, a huge Thank You to our fabulous sponsors who donated the amazing prizes to us.


And the winners are...

Lill - 1 x Macaron Pattern thanks to Colette Patterns
Josephine - 1 x Macaron Pattern thanks to Guthrie & Ghani
MaciNic - 1 x Macaron Pattern thanks to Stitch 56
Elizabeth - 1 x Pattern of your choice thanks to Sew Squirrel
Kathleen S - 1 x Colette Pattern of your choice thanks to Indie Stitches
Joanne - 1 x Colette Pattern of your choice thanks to The Haby Goddess
Amy - 1 x $20 gift voucher thanks to Fabric Worm
Sew Charleston - 1 x $30 gift voucher thanks to A Fashionable Stitch

All winners will be receiving an email from one of us shortly!!

Make sure you head on over to visit everyone else involved in the challenge, they've made some amazing creations. While I've gone the more casual route, there are some stunning evening versions in there which really does show how versatile this pattern can be -

Marie from A Stitching Odyssey
Reana Louise from Reana Louise
Rachel from My Messings
Sam from Buckingham Road

Macaron17

Macaron7

As I was editing these photos, it occurred to me that this looks a little like a modern version of Dorothy's dress from The Wizard of Oz and that I really should have worn red shoes for this photo shoot. Oh well, now I know what I'm going as to my next costume party, I just need to borrow a Toto from someone (can a black cat play Toto? We picked them up today, hooray!!)...

xx
Jen

One Pattern Seven Bloggers - The Sequel

Monday, August 19, 2013

Two years ago, myself and six other lovely bloggers took part in a challenge to make one dress from the same pattern. The aim was to infuse the pattern with our own tastes and styles to eventually come up with a dress completely different to everyone else's, while still having the same base. And, well, we're doing it again! We couldn't believe it had been 2 years since we had done the original and thought it was high time to revisit the challenge again. Two years older and hopefully, two years wiser.

So, a reminder of who we are...

Reana Louise from Reana Louise
Rachel from My Messings
Sam from Buckingham Road

This time, the challenge will happen over three blog posts, next week we will be talking about the inspiration for our dresses and any other tidbits we feel like sharing and then the following week we will be doing the big reveal.

Last time, I finished my challenge dress just before heading off to Vancouver for three weeks and this time around, I'm moving back home to New Zealand (!!). In fact, the movers have been and gone today with my sewing machine (and just about everything else we own...). I won't see it until late November now because there is also an epic Italian/UK adventure thingy happening in there as well. But never fear, I actually finished this dress and took photos of it a few weeks ago, because this little bunch of bloggers is so super organised that we planned this back in May!

We have chosen the Colette Patterns Macaron Dress as our base - an oldie but a goodie. This pattern has been on my 'To Make' list ever since it came out (a long time ago) and this challenge finally pushed me to get it done. And guess what? After I made my first dress, I hopped straight back to it and made a second dress. This pattern is pretty awesome, I'm wondering what on earth took me so long to make it!

Now for your chance to win!!

To celebrate the One Pattern Seven Bloggers project, we are hosting a huge giveaway thanks to 8 fabulous sponsors!


The Prizes
1 x Macaron Pattern thanks to Colette Patterns
1 x Macaron Pattern thanks to Guthrie & Ghani
1 x Macaron Pattern thanks to Stitch 56
1 x Pattern of your choice thanks to Sew Squirrel
1 x Colette Pattern of your choice thanks to Indie Stitches
1 x Colette Pattern of your choice thanks to The Haby Goddess
1 x $20 gift voucher thanks to Fabric Worm
1 x $30 gift voucher thanks to A Fashionable Stitch

To enter, all you need to do is comment on this post before Saturday 31st August with your email address! Make sure you head on over to all of the other participants blogs for up to 7 chances to win!

Terms & Conditions
  • Prizes will be randomly allocated to each of the 8 winners across all seven blogs.
  • One entry per blog.
  • You can comment on each of the 7 blogs for 7 chances to win (!).
  • The winners will be drawn and contacted by email on the 2nd September 2013.

I am so honoured to be included with this amazing bunch of sewing ladies. I've seen some sneak peaks of their dresses and they are rather fabulous!

xx
Jen

Tutorial - French Seams

Monday, August 5, 2013

French seams are a pretty way to finish off your seams if you have delicate, sheer, slippery or prone-to-fraying fabric because the raw edge ends up being enclosed in the seam. I used french seams in my Airelle Blouse because I was using a light weight, semi-sheer voile. They give a lovely professional finish without bulk and they are really simple to incorporate into your garment.

The trick to using French Seams is figuring out your seam allowances before you cut your fashion fabric. You could do this anyway you saw fit, as long as your first seam is smaller (or the same size but can be trimmed down) as your second seam, you should be fine.

For reference, the Airelle Blouse comes with a standard 5/8" seam allowance. For my side seams, when cutting out my fashion fabric, I decided to add an extra 1/8" to my side seams so I had a total of 6/8" seam allowance. Keep reading for more explanation of why I did this in picture form...

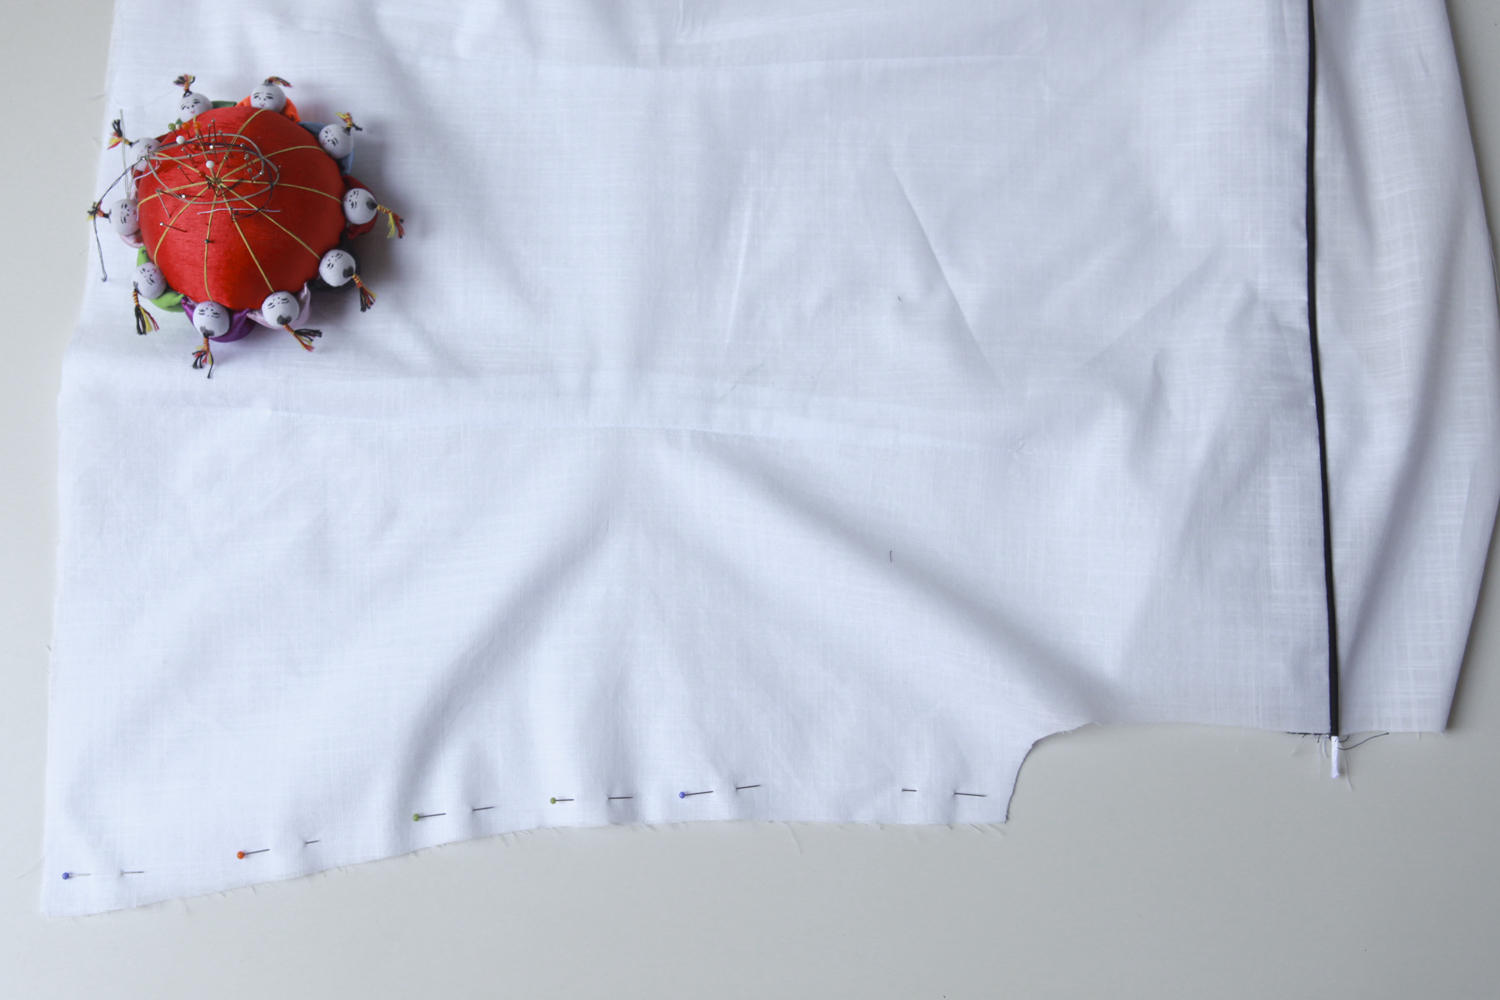
1. Rather counter-intuitively, pin your garment wrong sides together.


2. Sew your first seam together. I sewed mine at 3/8" seam allowance (half of my seam allowance of 6/8").


3. Trim your seam allowance down (I trimmed mine by about 1/8"leaving 2/8") and press your seams open.


4. Turn your garment inside out and press your seam flat. Pin in place and sew again at the remaining 3/8".


5. You now have a lovely, perfectly enclosed 3/8" seam.


You don't have to use my measurements for your French Seam though. For example, I cut the standard 5/8" seam allowance for my sleeve seam. I made my first seam 1/8" and then my second seam 4/8", ending up with a larger 4/8" finished seam.

Choosing how much to add to your seam allowance (if any) really depends on how much of a finished seam you want left at the end!


I hope this was helpful, please let me know if you have any questions in the comments...

xx
Jen

Auto Post Signature

Auto Post  Signature