Whether it's for a birthday, baby shower, wedding or to brighten up a room, bunting is pretty awesome stuff and it's super easy to make at home. Also, I've made you an awesome free downloadable pattern for both circular and triangular bunting!
A special thanks goes to David and his computer skillz for taking my hand drawn patterns and making them look like real patterns.
The pattern is designed to print onto 1 A4 sheet of paper - no random printer resizing should be required.
While I have used the circular pattern in my tutorial, if you choose to use the triangle, the steps are exactly the same.
Supplies:
- Free Bunting Pattern
- Fabric Scraps
- Bias Binding (learn how to make your own here!)
- Thread
- Fabric Scissors
Steps:
1. Gather your scraps of fabric and iron. Lay your bunting pattern on your fabric scraps.
Note: Get creative when laying out your bunting pattern and use as much of the fabric as you can, you don't need to really worry about grain when making bunting. You'll be surprised at where you can squeeze your pattern onto.
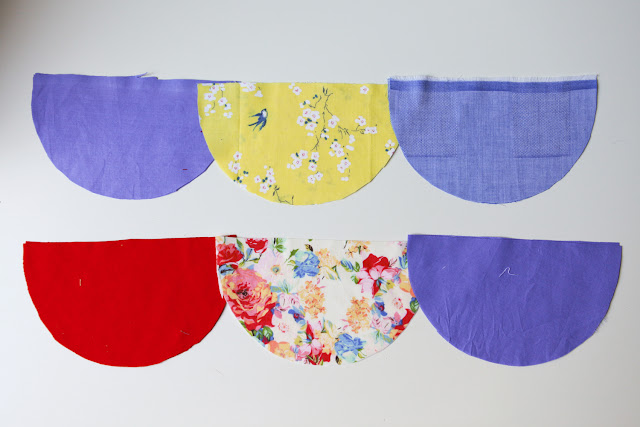
2. Cut your bunting out. As this is reversible bunting, you'll need 2 pieces of fabric for each bunting piece.
Note: Feel free to mix it up and use different fabrics on each side. This works particularly well if you don't have enough of one type of fabric.
3. Right sides together, sew your bunting together leaving the top open.
4. Trim seam allowances and clip corners.
5. Turn bunting inside out and iron. Now you can decide the order of your bunting.
6. Once you've decided on the order, take your bias binding and fold the end in about 1 inch (so you can pin your bunting to the wall, table etc). Place your first piece of bunting on the binding so that the raw top edge sits in the middle of the binding line.
7. Fold the binding over the top raw edge of your bunting and pin in place. Then place the next piece of bunting onto the bias binding - you can either place the bunting right next to each other (as I have done) or leave spaces between each piece.

8. Starting about 1/4inch in, sew a straight line down your binding. Make sure you catch all of the bunting edges in your binding.
Iron and Ta Da! You have your very own reversible bunting.
I used 10 pieces of circular bunting placed right next to each other ended up with a length of bunting measuring just over 64inches long.
A quick note about the size of your binding - as you can see, I used a really small width of binding for my bunting, and while it looks really cute, I wouldn't recommend it. It was difficult making sure the top bunting edge was securely sewn in. This was some vintage binding that I had had my heart set on using for this purpose ever since I got it though, so if you're like me, you've been warned :)
Let me know if you make any! I'd love to see it :)
xx
Jen


que bonito
ReplyDeletehttp://mandarinacosturera.blogspot.com.es/
Hi, paying a return visit! Thanks for stopping by and commenting on my little world. Just had a peek around and I love your stuff - very inspiring. I'll be back again, Gaenor.
ReplyDeleteGreat post. I made bunting for christmas last year and I just loved it. I love the half circle ones here. I found it easier to use the bias binding if I ironed in in half first...just made sewing easier than having to fold it over and have it not stay. Then I could stick the flag part right in to the crease.
ReplyDeleteSuch pretty bunting.
I kind of feel I see bunting everywhere these days but changing the shape (simple - why didn't I think of that!!) works really well (am now pondering other shapes too!). lovely fabrics too.
ReplyDeleteSo cute!! I love making bunting, the last set I made was triangles in a Kath Kidston-esque floral. All of the fabrics you've used are so cute, you've got me wanting to make more bunting :D
ReplyDeleteWe have a huge living room window, and I've been hanging garlands to soften the lines while not obscuring the view - bunting would be perfect! I got rid of my scrap collection when we moved across the country last fall, though, so I'll have to wait for it to grow again...
ReplyDeleteHello, love your bunting, can you tell me where the yellow fabric with blue birds is from? It's so cute! x
ReplyDeleteHello! Thanks so much :) It's actually a vintage fabric that I bought a reeeeeally long time ago. It's such a gorgeous fabric though, I totally agree. Sorry I can't be more helpful about where you might find some :(
Delete