Image Slider

Showing posts with label Bias Binding. Show all posts

Tutorial - Making and Inserting Inseam Piping

Friday, July 26, 2013

I used a contrasting black piping on the back of my Airelle Blouse and decided to document the process so that you can see how easy it is to make and insert inseam piping yourself.

Piping can add a sweet little detail to your garments. You can either choose to make it from a contrasting fabric or from the same fabric for a more subtle effect. Insert piping into yolk seams in shirts, waist seams in skirts and even along neck lines in dresses or other tops.

Supplies:


Steps:

1. Cut a strip of bias binding from the fabric you wish to turn into your piping. You will want your strip of fabric to be at least 2 inches wide (and as long as you need for your project plus a little extra).


2. Fold your bias binding in half, wrong sides together and lightly press (you only want a light crease, don't iron in a heavy line otherwise your piping won't be nice and round).

Use your ironed crease to line up your cord inside your bias binding.


3. Push your cord against the ironed line as close as possible and then pin in place.


4. Using your zipper foot, sew as closely as you can to your piping. Don't catch or sew over your piping though.


5. Trim the raw edge of your piping down to match your garments seam allowance, measuring from the stitching line you just sewed. For my garment, a 5/8" seam allowance is provided, so, on my piping, from the raw edge up to the line I sewed above is 5/8".


6. Sandwich your piping between your seams, right sides together, lining up your raw edges. Using your zipper foot again to guide you closely to your piping, sew along your seam matching up your seam allowance accordingly. 

Because you trimmed your piping raw edge down to match your seam allowance, you shouldn't catch your piping, but go slowly, there is no need to rush.


7. Turn your garment right side out, gently iron your seam allowance down and marvel at your lovely piping detail.


xx
Jen
Shop Patterns     .     Instagram     .     Twitter     .     Pinterest

Tutorial - Make Bunting (with free pattern!)

Friday, May 24, 2013


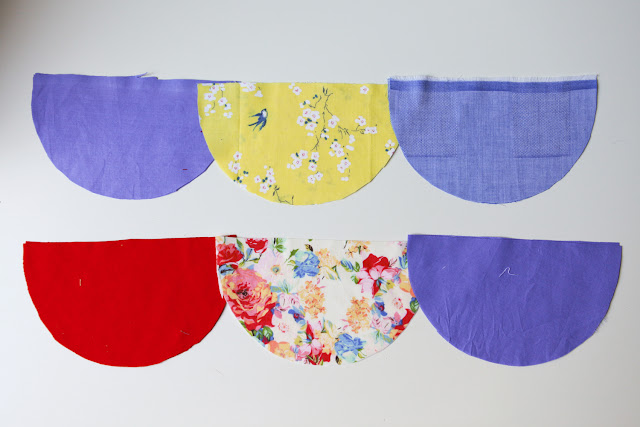
Whether it's for a birthday, baby shower, wedding or to brighten up a room, bunting is pretty awesome stuff and it's super easy to make at home. Also, I've made you an awesome free downloadable pattern for both circular and triangular bunting!

A special thanks goes to David and his computer skillz for taking my hand drawn patterns and making them look like real patterns.


The pattern is designed to print onto 1 A4 sheet of paper - no random printer resizing should be required.

While I have used the circular pattern in my tutorial, if you choose to use the triangle, the steps are exactly the same.

Supplies:

Steps:

1. Gather your scraps of fabric and iron. Lay your bunting pattern on your fabric scraps.

Note: Get creative when laying out your bunting pattern and use as much of the fabric as you can, you don't need to really worry about grain when making bunting. You'll be surprised at where you can squeeze your pattern onto.


2. Cut your bunting out. As this is reversible bunting, you'll need 2 pieces of fabric for each bunting piece.

Note: Feel free to mix it up and use different fabrics on each side. This works particularly well if you don't have enough of one type of fabric.

3. Right sides together, sew your bunting together leaving the top open.

4. Trim seam allowances and clip corners.

5. Turn bunting inside out and iron. Now you can decide the order of your bunting.

6. Once you've decided on the order, take your bias binding and fold the end in about 1 inch (so you can pin your bunting to the wall, table etc). Place your first piece of bunting on the binding so that the raw top edge sits in the middle of the binding line.

7. Fold the binding over the top raw edge of your bunting and pin in place. Then place the next piece of bunting onto the bias binding - you can either place the bunting right next to each other (as I have done) or leave spaces between each piece.

Keep adding your bunting pieces to your binding until you run out. Then leave another 1inch of folded binding at the end.


8. Starting about 1/4inch in, sew a straight line down your binding. Make sure you catch all of the bunting edges in your binding.


Iron and Ta Da! You have your very own reversible bunting.

I used 10 pieces of circular bunting placed right next to each other ended up with a length of bunting measuring just over 64inches long.

A quick note about the size of your binding - as you can see, I used a really small width of binding for my bunting, and while it looks really cute, I wouldn't recommend it. It was difficult making sure the top bunting edge was securely sewn in. This was some vintage binding that I had had my heart set on using for this purpose ever since I got it though, so if you're like me, you've been warned :)

Let me know if you make any! I'd love to see it :)

xx
Jen
Shop Patterns     .     Instagram     .     Twitter     .     Pinterest

Tutorial: Replacing Facings with Bias Binding

Saturday, May 11, 2013


I've mentioned before that I love bias binding. I especially love using it in place of facings on arm holes and where appropriate, neck lines. It moulds nicely around curved edges and leaves you with a lovely clean finish on the inside (and outside!) of your garment while reducing the bulk that facings can sometimes leave. 

I have a tutorial on how to make your very own bias binding here

Supplies:
  • Bias Binding (the required length depends on the facing you are replacing)
  • Pins

Optional - Needle and thread (if you are not going to machine topstitch your binding down)

*Note - in the pictures below I am replacing the neck line facing but I did also replace the arm facings on this dress.

Steps:

1. Right sides together, pin your binding along the closest ironed line to the facing area you are replacing. Pin all the way around and leave about 1 inch loose at each end (ignore the fact that I didn't leave said inch in the photo below!).


2. Once your binding is pinned all the way around, pinch the loose ends of bias binding together (right sides together) and pin. 

*Note - I forgot to take photos of steps 2 & 3 on the dress and so recreated them later. I just realised the binding is pinned to the wrong side of the fabric on these though! Sorry!!


3. Sew ends together along the pin. Trim seam allowance and iron flat.


4. Machine stitch your bias binding in place following the folded line you have pinned down.


5. If you don't want any binding showing (as in the headline image), fold the binding all the way over your raw edge, iron and pin in place. You can then either invisible hand stitch the binding in place or top stitch using your machine.

*Note - As I used an underlining on this dress, I hand stitched my binding to my underlining using a whip stitch instead.


OR

If you want to make a feature of your binding, fold it down around the raw edge of your garment so half of your binding is exposed. Hand stitch or machine stitch as desired. An example of where I have done this is here.

And, that's it!!

xx
Jen

Shop Patterns     .     Instagram     .     Twitter     .     Pinterest

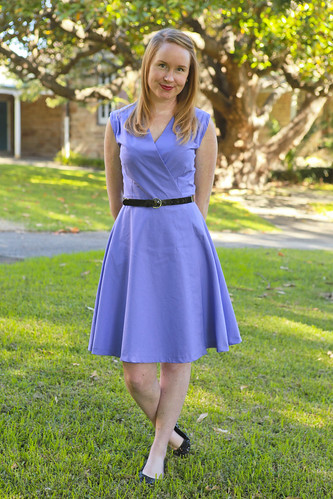
That's a {Violet} Wrap {Dress}

Wednesday, May 8, 2013
Please don't ask me how I come up with those post title gems...

5May 2013 4


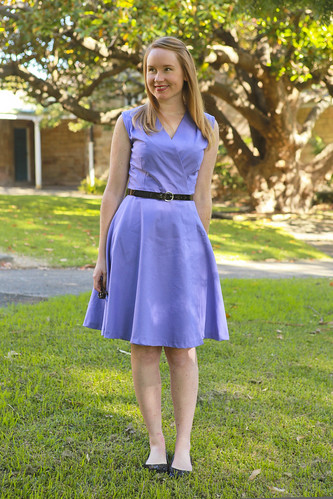
This pattern has been sitting in my pattern stash for at least a year (probably longer). I fell in love with the violet dress on the front as soon as I saw it, but the only problem was that I just couldn't seem to find the right coloured fabric! It needed to be a violet wrap dress. No other colour would do.

Needless to say, I found the right fabric a few weeks ago, but guess what? It's actually cotton quilt backing! I know, I'm such a rebel.

I firmly believe that you can go ahead and use quilting cottons (and backings!) if they fit with the style of garment you are making. If the garment calls for a stiffer fabric, then go ahead and walk straight over to those quilting cottons and gush as much you like! 

Also, the best thing about buying quilt backing for a project? You get twice the amount of fabric for the same price because it's folded over double on the bolt. You really can't lose folks.


5May 2013 5


While the dress itself was relatively simple to make up, I spent so much time on hand sewing I could cry. I really really didn't want to lose the clean lines down the front of the dress by top stitching my facings in place by machine, and so I did it all by hand. If I didn't know how to do an invisible hand stitch before, I sure do now. But just look at that hand stitching! Oh wait, you can't...


5May 2013 6


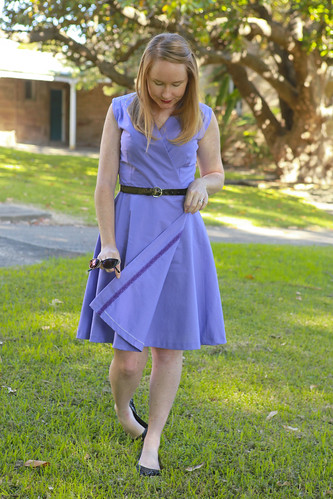
I also added some purple hem lace to the front line of the skirt. This was actually lace left over from our wedding and I still have a bunch of it in all sorts of happy colours. I really love the result and think my next few garments will probably all have lace detailing of some kind on them. Need a tutorial on how to do this? Let me know in the comments.


5May 2013 3


Last but not least, I swapped out the arm facings for bias binding. I have a tutorial on how to make your own bias binding here and will have a tutorial on replacing arm facings with bias binding on the blog on Friday!

So, tell me, have you ever used quilt backing or quilting cottons for a garment? Did it turn out well?

xx
Jen

Tutorial - How to Make Bias Binding

Friday, May 3, 2013

I love bias binding. I use a lot of the stuff in my garments so therefore, I make a lot of it.

Making your own bias binding is easy as pie and it's extremely useful for all sorts of things. I tend to use it in place of arm facings on sleeveless garments a lot. I think that using bias binding reduces bulk around the sleeve and leaves you with a lovely clean finished edge (and check back next week for another handy tutorial on how to do just that!).

As I am just finishing up making a 60's violet wrap dress, with which I am predictably replacing the arm facings with binding, I thought I'd photograph the steps I used so that you can make your very own.

So first up - what is the bias?

The bias is the diagonal line that rus through the cross and length wise grains in your fabric. The bias is nice and stretchy, making it perfect to mould around circular edges like an arm hole, without bunching or pulling at your fabric.


Supplies:

  • Large square of fabric cut on the grain (mine is about 30cmx30cm however, it doesn't matter if you can't make yours that big as we end up sewing our bias strips together to make one long one)
  • Fabric Scissors
  • Ruler or seam gauge
  • Marking utensils
  • Iron

Optional - An awesome bias binding thingy (this is what I'm talking about! You can get them in a bunch of different sizes). But you can make bias binding perfectly fine without one and I show you how to do this below as well.

Steps:

1. Fold your square in half on the diagonal and lightly press.


2. Your lightly pressed centre line will be the line that we will base all other bias strips off and it will become the centre of your first (and biggest) strip of bias binding.

At this stage, you need to decide how big you want your finished binding to be. I personally like a binding that ends up being about 1cm when it's all folded, but you can make it any size you need. The rule is, if you want 1cm showing at the end, times that length by 4 and that is the width you want to mark out.

Measure out your widths using a ruler or seam gauge using your centre line to base off all measurements.

Note: for this binding, I wanted it to be slightly smaller and measured out 3.2cm so my finished binding ended up as 8mm.


3. Draw in those lines that you've marked. You can then mark the rest of your bias strips right next to each other, there is no need to leave a gap. Now you are ready to cut your strips!


4. Once you've cut your strips, square up the ends of your binding to make it easier to sew them together.


5. Place your strips, right sides together, at a 90 degree angle. Sew across the 'square' they make along the diagonal.


6. Trim your seam allowance and press open. You have now joined your strips together.


7. Continue joining them together until you have your desired binding length. Now you can use your handy dandy bias binding thingy to pull your bias strip through and iron as you go.


OR

If you are using the iron, fold your binding in half (wrong sides together) and press lightly. Then fold your outside edges in, lining them up with the centre crease you made earlier. Iron them down.


8. Once your outside edges have been folded in towards the centre (either by using your bias binding thingy or just your iron), fold your binding in half again and iron flat. Ta da! You have just made your very own bias binding. How clever you are!


Now you can wrap your binding around a piece of card or on to an old wooden bobbin (that would look cute!) ready to use when you need it.

Making your own binding is a really great skill to have. You can mix and match colours to make neat details on your garments, use it in place of facings, make bunting, use it to make pretty twirly patterns on dresses...the options are endless!

You can, of course, buy your bias binding, but why would you when it's so easy to make?

xx
Jen

Shop Patterns     .     Instagram     .     Twitter     .     Pinterest

Note:
Don't be afraid to mark your fabric on the underside in a more permanent way when marking out your binding (I used a ball point pen in this tutorial so that the lines showed up in the photographs).

I used to be petrified to mark my fabric with anything more permanent, but the truth is, if you do it correctly, nobody will ever see it. I find that chalk rubs off too quickly and easily for my liking and I would rather have accurate markings that stay where I need them to than have them rub off half way through ending in me 'winging it'. Just remember, if you are using a light/sheer fabric, choose your marker accordingly.

Auto Post Signature

Auto Post  Signature