

French seams are a pretty way to finish off your seams if you have delicate, sheer, slippery or prone-to-fraying fabric because the raw edge ends up being enclosed in the seam. I used french seams in my Airelle Blouse because I was using a light weight, semi-sheer voile. They give a lovely professional finish without bulk and they are really simple to incorporate into your garment.
The trick to using French Seams is figuring out your seam allowances before you cut your fashion fabric. You could do this anyway you saw fit, as long as your first seam is smaller (or the same size but can be trimmed down) as your second seam, you should be fine.
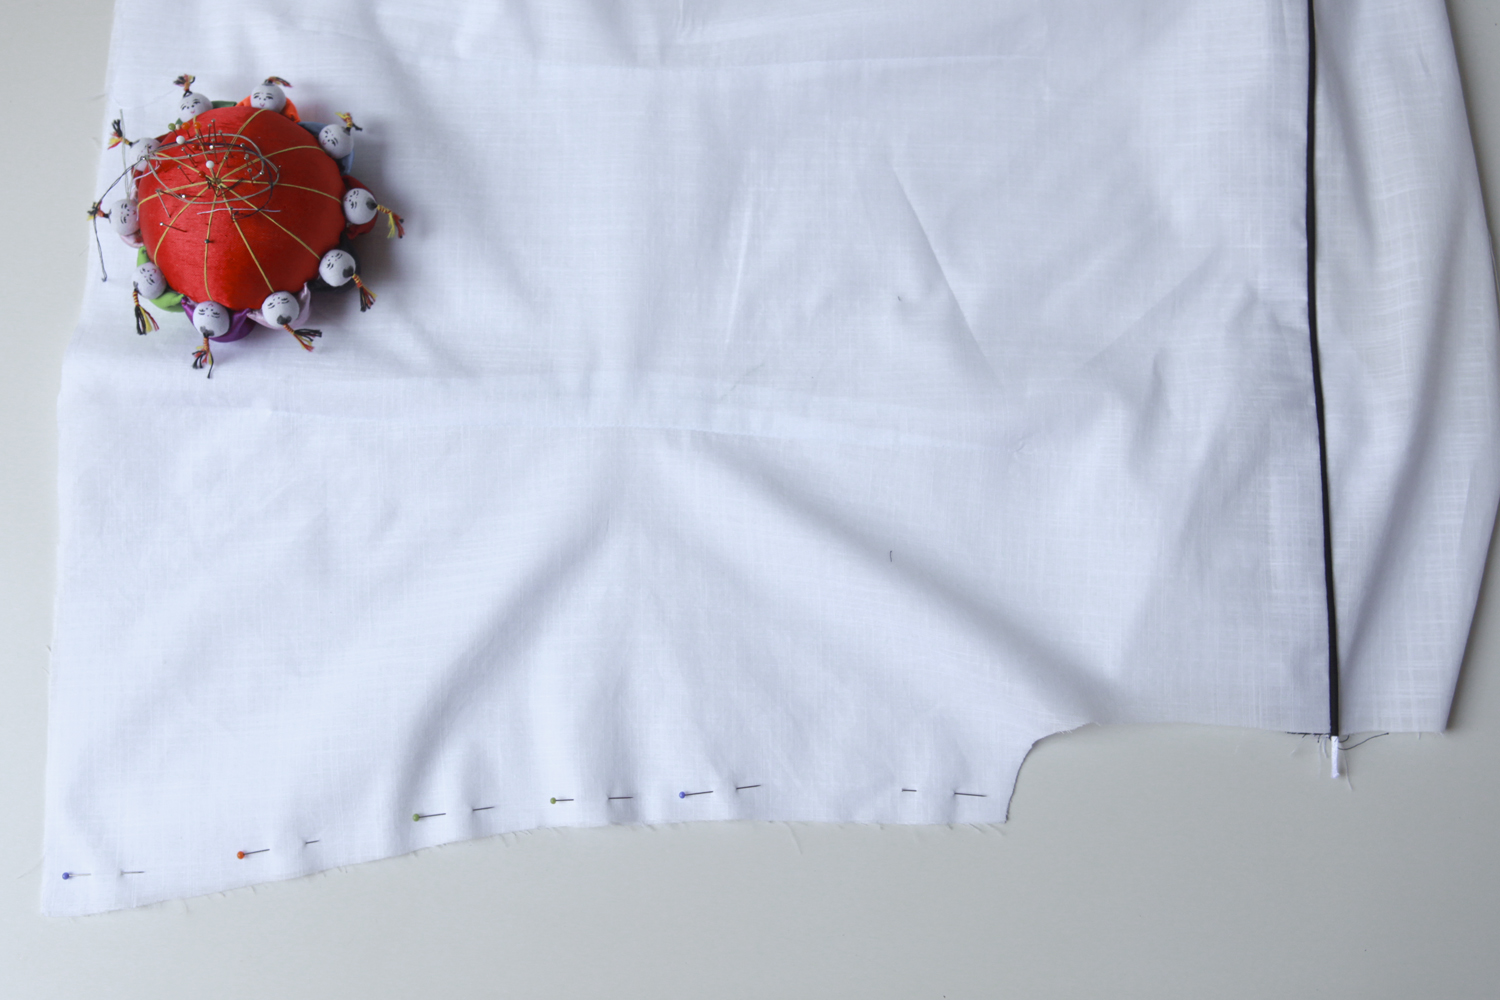
For reference, the Airelle Blouse comes with a standard 5/8" seam allowance. For my side seams, when cutting out my fashion fabric, I decided to add an extra 1/8" to my side seams so I had a total of 6/8" seam allowance. Keep reading for more explanation of why I did this in picture form...
1. Rather counter-intuitively, pin your garment wrong sides together.
2. Sew your first seam together. I sewed mine at 3/8" seam allowance (half of my seam allowance of 6/8").

3. Trim your seam allowance down (I trimmed mine by about 1/8"leaving 2/8") and press your seams open.

4. Turn your garment inside out and press your seam flat. Pin in place and sew again at the remaining 3/8".

5. You now have a lovely, perfectly enclosed 3/8" seam.

You don't have to use my measurements for your French Seam though. For example, I cut the standard 5/8" seam allowance for my sleeve seam. I made my first seam 1/8" and then my second seam 4/8", ending up with a larger 4/8" finished seam.
Choosing how much to add to your seam allowance (if any) really depends on how much of a finished seam you want left at the end!


I hope this was helpful, please let me know if you have any questions in the comments...
xx
Jen


Thanks Jen. The measurements were really useful and the seams look so professional.
ReplyDeleteI have always wondered what french seams are - and now I know! SO easy to understand - thank you lovely lady! I really, really want this blouse pattern now.
ReplyDeleteThanks for sharing a different approach to French seams. I love the finish they give, but I usually just stitch my first line at about 1/4" (AKA where the foot sits along the edge of the fabric), iron and stitch again with little regard (I usually only use it on looser fitting items.
ReplyDeleteI might try this for an unlined Elisalex. It could work a treat!
Thank you so much for the tutorial! I am going to use this technique in my next garment. I am wondering about the pressing process. Why do you press it twice? You press the seam open first and then you press it close again, when you move the fabric. Can't you just skip the first pressing? Thank you!
ReplyDeleteHi Edyta! Glad you liked the tutorial :)
DeleteThe reason why I like to press the seam open flat and then fold it over, is because I find I get a much more accurate fold. You really want your first seam line to be the edge of the fold line, and if you don't press your seam open, I find it tends to sit either side of the fold.
But, some people may choose to skip the extra pressing this step which is also fine. I have skipped it in the past but found it much harder to get an accurate seam line.
Hope that helps!!
Yes! Thank you! I can't wait to try French seems!
Deletemy mom has that pincushion!
ReplyDeleteMy Mum had one too! I bought it in Beijing airport when we had a stop-over a few years ago because my Mum had one. Brings back lovely memories :)
Delete