Image Slider

The Round Retro Cushion - Pattern Chart & Tutorial

Saturday, March 1, 2014

Now that we've bought our very first home, I'm itching to get in and make it our own. Ever since I joined Pinterest, I've been furiously pinning inspiration for when when it eventually happened and having a round retro cushion (or two or three!) was high on the list.

I've always loved the round retro cushion, but I just couldn't justify the expense of buying one - cushions are serious investments these days! So, I decided to make one and show you guys just how easy it is to make your own as well!

Make sure you download the pattern chart I've created to go along with the tutorial below. The pattern chart is not to scale, but explains in black and white the pattern markings you need to make on your fabric to make making the Round Retro Cushion a breeze.

 JLV Round Retro Cushion Pattern Chart

The bulk of the cushion is hand-sewn, so it does take longer to make than your traditional square cushion cover, but the results are simply gorgeous (the centre grid on this cushion took me about 2-3 hours to hand sew one evening). It also gives you a chance to practice your hand sewing and it's really quite forgiving if you're a bit rusty.

While the cushion itself looks complicated, I've hopefully made the process much easier to understand and once you get the hang of it, it's a little like knitting with it's repetitive stitches which makes it great t.v sewing.

Supplies:
  • Free Downloadable Pattern Chart
  • Rectangle of fabric measuring 22inches width by 47inches length
  • Matching Thread
  • Hand-sewing Needle
  • Pillow Inner (Round - 40inch circumference or Square - 15x15inches)*
  • Pins
  • Ruler
  • Fabric Marker of your choice (I used a ball point pen)
  • 2x 2inch Buttons (or similar)

*Use these measurements as a guide only as they really depend on how 'full' you want your final cushion to be. For reference, I used a square 15x15inch insert in my cushion.


Steps:

1. On the wrong side of your fabric, measure out your grid according to the pattern chart download. You should end up with 46boxes in length (with 1/2inch SA on each side) and 8boxes width.

Note: You will not be able to see the underside of your cushion. So while you can use a fabric marker that will rub off like tailors chalk, I've gone for a black ball point pen here because I didn't want my markings disappearing half way through sewing.


2. Draw in your diagonal lines according to the grid in the pattern chart download.


3. Double thread your needle and tie a knot securely at the end. Use a length comfortable for you as you'll need to re-thread several times throughout the project.

4. Starting at the corner of your first box (Point A on the pattern chart), thread your needle into the corner pulling the thread through to the end.


5. Then take your needle and following the diagonal line you drew in, thread the needle through the opposite corner (Point B on the pattern chart).


6. Draw your two diagonal corners together tightly with the thread so that they are touching, then thread the corners together one more time to secure and tie a knot in the thread (don't cut your thread off).


7. Now that your first box is secure, take your needle across to the corner of your second box (Point C on the pattern chart) and keep this thread loose! You do not want it tight. Tie a knot at Point C.


8. From Point C, take your needle and follow your diagonal line to the corner at Point D and draw C and D tightly together (as you did for A and B). Thread the corners together again as you did at step 5. and tie a knot.


9. Continue in this manner up your first row (down your second, and up your third) drawing your diagonal lines tightly together so they are touching and keeping your horizontal lines loose.

Note: If you accidentally make your horizontal lines too tight, don't worry! Because you've been knotting your thread in each corner as you go, you can snip this thread without worrying that your sewing will come apart.

As you sew up your first row, this is what the right side of your fabric will start to look like - it looks a little like you're plaiting your fabric!


And this is what the underside of your fabric will look like - 


10. Once you've finished hand sewing your centre grid, with right-sides together, pin your 1/2inch seam allowance together at the side, taking care to match up your 'plaits'.  Sew together using your sewing machine.

Note: your seam allowance will want to 'bubble', but try as much as you can to sew them together with no bumps or gathers in the fabric. If you can't manage to sew the seams flat, don't worry too much as your side seam does become hidden in the folds of the fabric.


11. Once your side seam is sewn up, you'll end up with a tube of fabric. Turn it right side out and prepare your pillow inner.

Note: in the photo below, you can see my side seam (centre of the photo). You can see already that the seam has almost disappeared into the 'plaits' in my cushion. It will also be hidden on the top and bottom with the pleats.


12. Insert your pillow inner. Make sure the 'plaited' centre of your pillow case is going around the circumference of your pillow inner.

Note: you'll notice that my 'round' retro cushion is actually kind of square. That's because I used a square insert that I already had on hand. Feel free to use a square, rectangle or round insert depending on what shape you want your final cushion to end up as.


 Looks a bit like a bug here, no?

13. With your pillow inner in place, pick a side and start pleating the fabric into the centre. Pin your pleats in place.

You'll notice that your pleats will form quite naturally and easily from the plaits around the circumference of your cushion. Just make sure you angle all of them to the centre and they should fall into line. Adjust as necessary until you are happy. Repeat with the other side.


14. Once you are happy with the position of your pleats, secure them in place with a few hand stitches. You don't need to be too neat as the stitches will be hidden with a button, but do make sure they are secure.

Once both sides are secure, run your needle and thread back and forth through the centre of each side of the pillow and pull tight. This will give your cushion that lovely indent in the centre making it look plush and soft.


15. Nearly there! Finish off both sides of your pillow with a button to hide your hand stitches. It can either be a self covered button or a contrasting button.

If you are using a standard button with holes in the centre, it's best to sew these in. However, if you are using a self covered button or a button with the shank on the underside (and not visible) you can go down the lazy route and glue them on with either a hot glue gun or fabric glue.


TA DA!

You now have an awesome retro cushion ready to adorn your couch, chair or bed!!!


This kind of sewing project is great to take everywhere with you as you don't need a sewing machine for most of it. Do it while waiting for the bus, take it on holiday with you or simply have it around for when you have a spare few moments to sew but don't want to set up your machine. It's just as portable as knitting, if not more so!

Feel free to get creative and add or omit rows of 'plaits' or even change up the size of the squares in the grid - you may want 2inch boxes or half inch boxes! Do note however, that changing the grid sizes may change the size of fabric or pillow inner required.

These cushions also make great gifts as they look really complicated, but in reality, the most complicated part is making the time to do it.

If you do give one of these a go, please let me know!! I'd love to see them.

xx
Jen

ps) Making and writing these tutorials takes a butt-load (technical term) of time. If you do make one of these and blog or write about it, please make sure you link back to me! Thanks!

New Sponsor - Indie Stitches

Thursday, February 27, 2014


Tomorrow is moving day (one of at least two...and thank you all so much for your congratulations!) and today we are packing, but I wanted to quickly let you know that I've just taken on my first official sponsor.

Without further ado, I'd like to welcome Indie Stitches!

I'm so happy and excited to have Caitlan on board and we have some pretty cool giveaways coming up in the next few months for you, so make sure you keep an eye out.

You'll also notice on Caitlan's button (to the right!) that you get a sweet 10% off all patterns at Indie Stitches if you quote JLV at the check out! So many goodies to choose from...

Don't forget to enter to win your very own copy of the Emery Dress pattern courtesy of Indie Stitches either. You can enter here, but do it toot sweet as entries close on Monday 3rd March (that's NZ time - a whole day ahead of a lot of you! Don't worry, the future is good...)

xx
Jen

Honey, We Bought A Home!

Friday, February 21, 2014

Yes. Finally. After years and years of dreaming about owning our own home, we gosh darn gone bought us a house!

  • We move in next Friday (28th February).
  • It's a 1940's three bedroom home with gorgeous ceilings.
  • It comes with three chickens who give us three eggs a day (I'm going to be baking and eating omelettes like there's no tomorrow). 
  • I'll have my own, very first ever, dedicated sewing room/office.
  • It has an established garden with 3 apple trees, 2 plum trees, 3 hazelnut trees, blackberries, black currents, red currents, raspberries, strawberries, alpine strawberries, blueberries, a huge vege patch, 2 glasshouses, a grape vine, rhubarb everywhere, 2 Feijoa trees, a fig tree, a cherry blossom, herbs...weeds. So many weeds.
  • The garden isn't even really that big. 
  • There's a bit of work to do.
  • I couldn't be happier!

David and I are going to be starting a blog following our renovation of the house. It's going to be a long process as we figure out just what exactly we want to do with it. But it's exciting. No more sewing in a room surrounded by unpacked boxes of our things from when we left Sydney.

I'll let you know when we've set up the blog if you want to follow along...

xx
J

An Emery and a Give Away...

Monday, February 17, 2014
I'm pretty sure most of the internet knows about the Emery Dress by now, right? It's Christine Hayne's latest pattern release and it's such a lovely design that really lets you get creative with finishing touches and construction techniques.

Oh, and you know it has pockets right? I think pockets will forever be the thing that seals the deal with seamstresses all over the world.


A few weeks ago I had a lovely email in my inbox from Caitlan who runs Indie Stitches. She was letting me know that she had just started stocking Christine's patterns and wanted to know if I'd like to help her celebrate by running a giveaway of the Emery Dress pattern on my blog for you guys. Well, of course I said yes (because I'm not silly you know!), so make sure you read on for your chance to win!

My Emery is made from a denim blue cotton plaid, perfect for the cooler seasons ahead - although on the day we took these photos, it was a bit less summery than I would have liked!

I did my usual grading at the bodice, from a 6 to an 8 and found that although it (would) fit perfectly, the shaping darts were about half an inch too low. Nobody else has seemed to have this problem with the pattern however and it's an easy fix. I must have had a moment when tracing the pattern and accidentally used the wrong sized darts. Duh!


Monty photobomb!

I constructed my bodice a bit differently than Christine instructs as I was using a standard vintage zip and not an invisible one. I also made my bow belt instead of using the attached bow pattern because I thought the dress would be a little more versatile sans bow.

The lining I used was left over floral fabric from my Faux Liberty Macaron. And I also kinda wish I had made floral inseam piping for the neckline after seeing it peeping out once it was sewn in. But in all honesty, I couldn't really be bothered unpicking it, so instead settled for ironing up the lining a smidge so you can just see it.

Hey, it works!


Over all, I really love my Emery - the colour, the full skirt with pockets and that lovely neckline. I think a sleeveless version is in order, no?


Now, let's get to the fun part and do a give away shall we?

To enter to win, all you need to do is pop on over to the Indie Stitches Facebook page and like it. Then come back here, let me know you've entered in the comments and you're done.

If you already like Indie Stitches on Facebook, don't worry, you can still enter too!  Just share the page with your friends on Facebook and leave me a comment letting me know you've done it.

The competition is open internationally for two weeks (entries close on Monday 3rd March) and the winner will be notified via email by Friday 7th March.

Indie Stitches also posts worldwide, so if you can't wait to win a copy of the Emery dress pattern, you can buy it here.

So, let's help Caitlan celebrate stocking Christine's patterns!! It's par-tay time guys!
xx
Jen

The Easiest Peplum Top - A Tutorial

Tuesday, February 11, 2014


This little peplum top is so easy to make. I made mine with the free Colette Patterns Sorbetto top, but I think this would look equally cute with any top that is relatively blouse-y and non-fitted. You could also easily update a mens shirt using this method as well!

Supplies:

  • A Non-fitted Blouse Pattern
  • 1/2inch (13mm) Bias Binding (Learn to make your own here)
  • 1/4inch (7mm) Elastic or Ribbon
  • Measuring Tape
  • Scissors


Steps:

1. Trace out your blouse from the pattern and make any necessary changes. At this stage, you should add length if you want it, and if you are wanting a bigger peplum, grade your pattern out a size or two at the waist and hips.

2. Make up your pattern according to the instructions.

3. Find and mark where your waist is on the blouse. Turn it inside out and with your blouse flat, measure along the marked waist line all the way around. This is the waist circumference measurement of the blouse.


Tip: To get your accurate waist placement, put your blouse on and then put a skinny belt or loop of elastic on over the top. The belt/elastic will sit naturally where your waist is smallest, mark this placement using a pin or fabric marker.

4. Measure out a length of bias binding using the blouse's waist circumference measurement and add on  two inches for the bias binding seam allowance.

5. Fold under the bias binding seam allowance, 1 inch each end, wrong sides together and iron.


6. With your blouse still inside out, line up one edge of your bias binding with a side seam of your blouse. Pin your bias binding, wrong-side down, along your marked blouse waist circumference.


7. Sew your bias binding down on each side as close to the edge as you can get starting at one end of the bias binding. Do this on both edges.


8. Cut out a length of elastic that is comfortable for you. A general rule is to take your waist measurement and minus 3 inches to get a comfortable amount of elastic for your blouse. However, this is dependent on how stretchy your elastic is. Another way you could measure your elastic is to put it around your waist and stretch it until you are happy with the fit. Add an extra 2 inches to this measurement for seam allowance.

9. Attach a small safety pin to one end of your elastic and pull through the bias binding casing from the side opening. It should fit nice and snuggly into the bias casing, but make sure there are no twists in your elastic as you go.


10. Before you secure your elastic ends permanently, safety pin the elastic together and try the blouse on to make sure you are happy with the amount of elastic you are using. Make any adjustments to the elastic length at this stage and then secure the elastic ends either using a hand or machine stitch.

Et voila! You have now made a super cute (and easy) little peplum blouse!


As I was making this, I realised how cute the contrast bias binding would look if placed on the right side of the blouse as well, so I took some photos to show you. I've used a piece of white ribbon here to demonstrate how you could use a cord or ribbon and tie them at the side of your blouse if you chose to put your binding on the outside of your blouse. (And, yes, this is the blouse inside out! Love french seams for making it look otherwise!).


Do let me know if you make your own Easy Peplum Blouse. I'd love to see them and hear how they worked out!

xx
Jen
Shop Patterns     .     Instagram     .     Twitter     .     Pinterest

Building & Wearing a Hand-Made Wardrobe - Back to Basics

Friday, February 7, 2014


I'm so glad so many of you enjoyed my first post in this series of Building & Wearing a 
Hand-made Wardrobe!

Today I wanted to talk about going back to basics in our hand-made wardrobes, to talk about those items that we can make in a few hours that can form a base for several hand-made outfits.

Basics are pretty amazing things when you actually think about them. They take very little of our precious sewing time to make up, but open up a whole host of different hand-made outfits that can then be worn because of them.


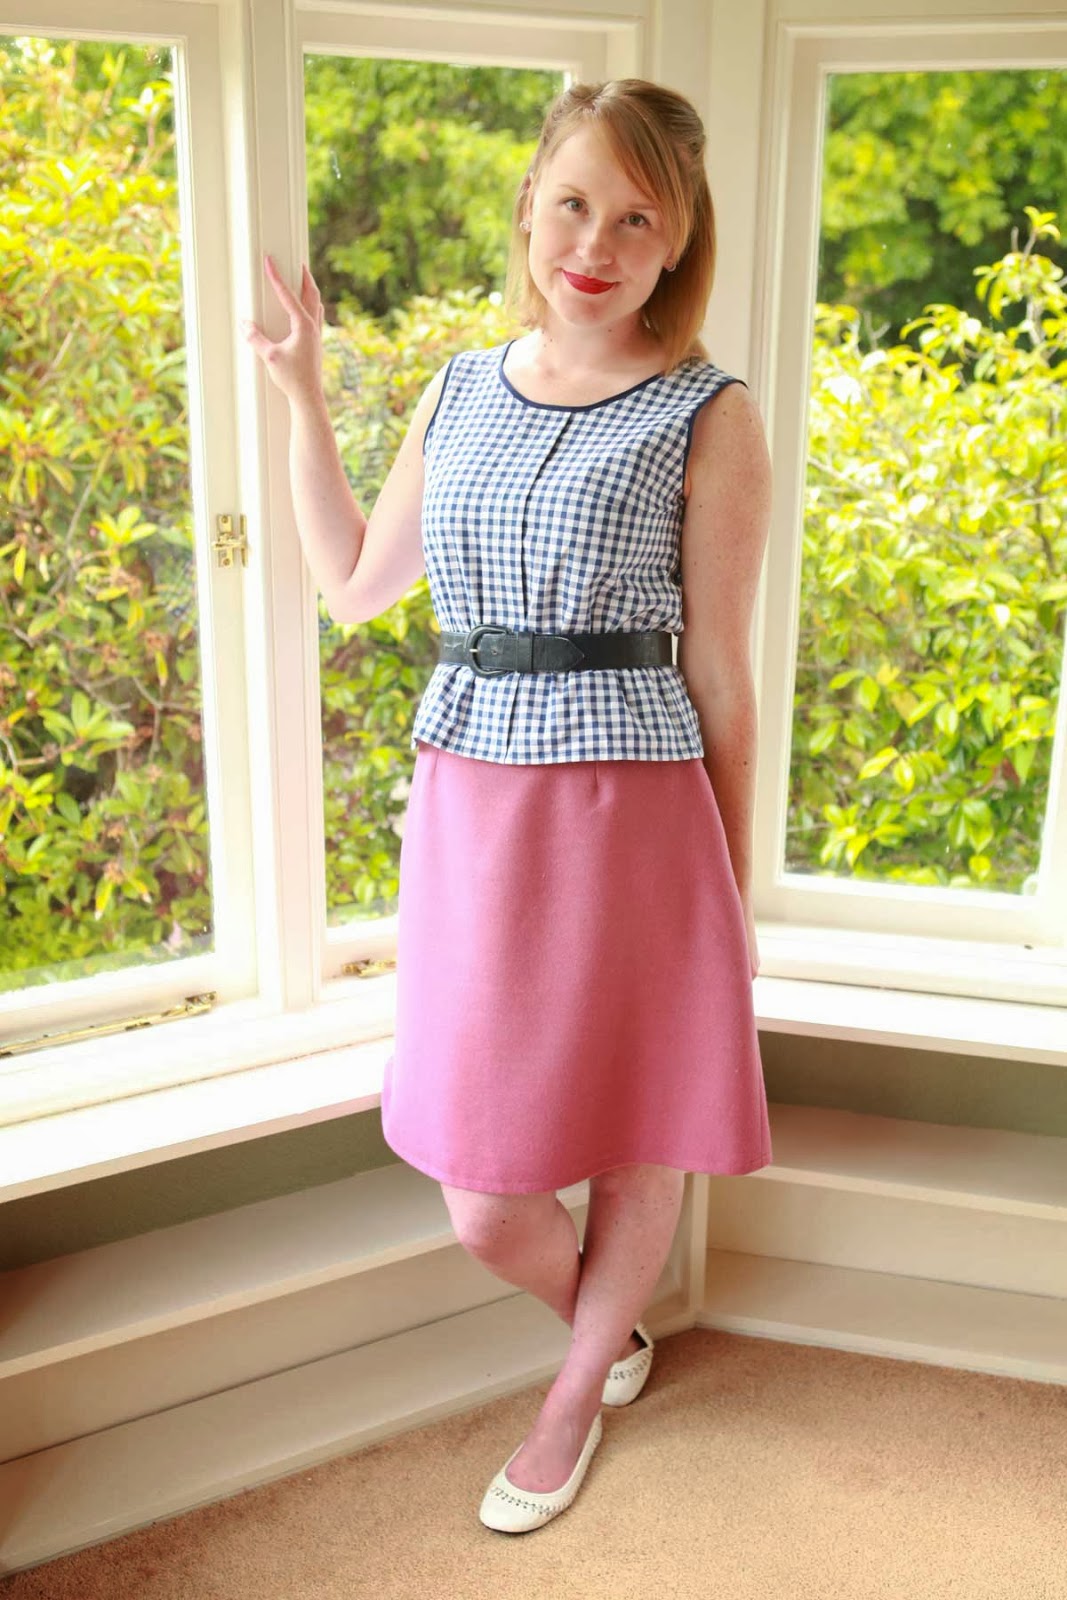
Today I'm wearing a Colette Patterns Sorbetto (free to download!) that I've turned into a little peplum blouse. There are so many free basic patterns out there that are easy to sew up, to adapt and that can provide the means to wear some of the more outrageous items in our hand-made wardrobes that may otherwise never get worn because nothing else goes with them. 

As I discussed in my first post in this series, sewing basics doesn't have to be boring or mean doing the same techniques over and over. Basics provide the amazing opportunity of interpretation, customisation and personalisation of a garment. They also provide the perfect platform to try more complicated construction techniques and to test out different design ideas, while also letting you try out new styles without too much heartbreak if they just don't work out.


This little Sorbetto took me about 3 hours to make all up (if that), has french seams and the obvious addition of the peplum. I can wear the peplum out as I've done here or tucked in (and I've found that tucking in the peplum means I have a perfect distribution of 'pouff' out of the top of my skirt, which means I'm not forever adjusting my blouse). This little blouse also goes with so many things in my hand-made wardrobe and is the perfect summer staple being made up in a navy gingham cotton which is both affordable and easy to wash and wear.

Throughout the year I'm going to be showing you a few different things you can do to jazz up basics, including how to make your very own Peplum Sorbetto coming next week (it is so easy)!

So, if you're one of those people who loves sewing bright, complicated garments that never get worn, then maybe try sewing up a basic to go with it! You never know, it might get worn a whole lot more and become a staple go-to outfit.

xx
Jen

Auto Post Signature

Auto Post  Signature