Image Slider

Showing posts with label Blouse. Show all posts

Quick Tips for Sewing with Silk

Sunday, April 27, 2014

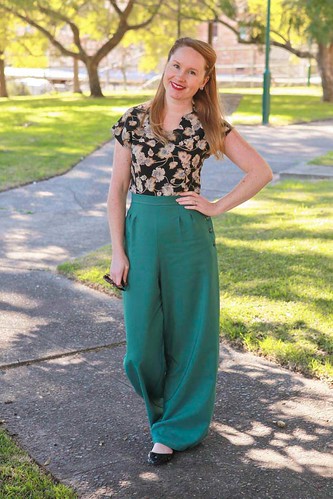
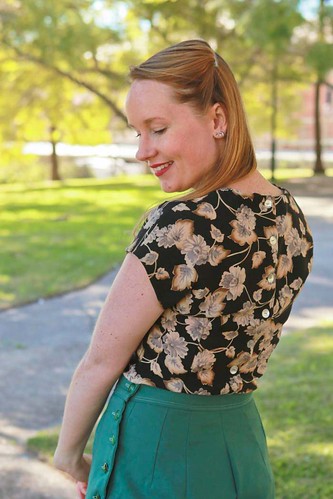
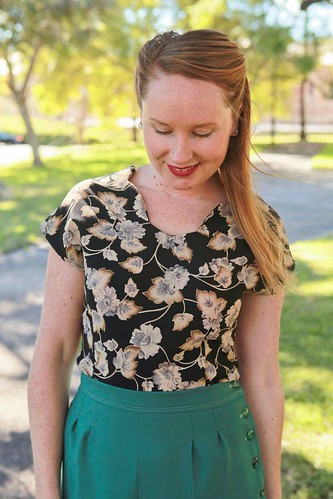
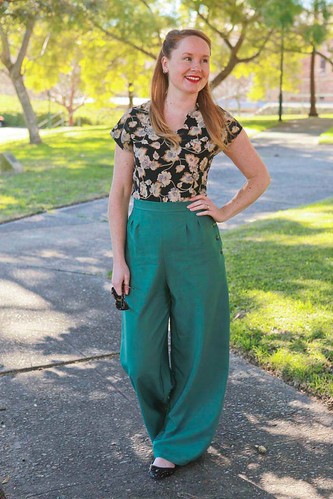
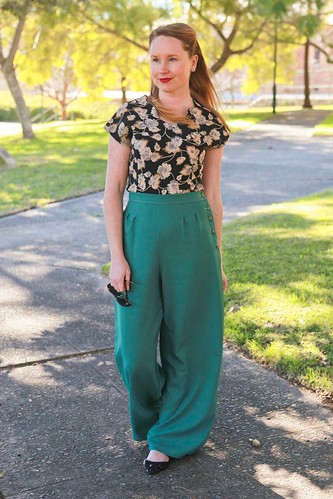
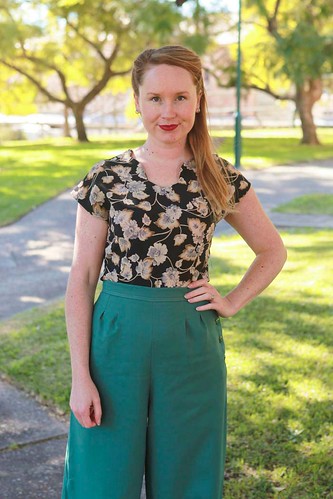
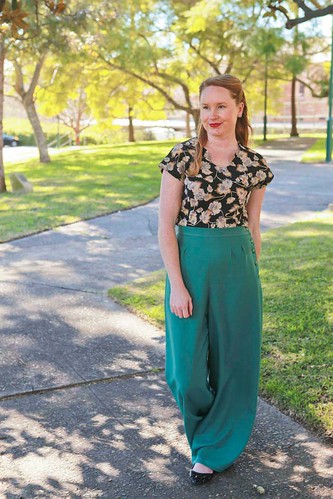
Silk is such a luxurious fabric to wear, unfortunately, sewing with it is not so luxurious. In fact, it's a real pain in the butt if I'm being honest. So today, I wanted to share a few tips about sewing with silk (and other fine/slippery fabrics) that I've picked up in my time sewing with it, just in case you fancy making your Afternoon Blouse from it.

The major issue I've always encountered with silk is that because it's so slippery, it tends to move off grain during cutting. Unfortunately, you can muslin a garment as many times as you like to get the fit right, but if the pattern pieces slip off grain when it comes time to making it with your fashion fabric, chances are the final garment won't fit right. So...

1) Think about cutting one pattern piece at a time instead of folding your fabric to cut out 2 pieces. It might take longer, but generally, the pattern piece that is going to slip and go off grain is going to be the bottom piece. For pattern pieces that are placed on the fold, I would recommend re-tracing the pattern piece into one whole piece, and cutting in a single layer from that.

2) If you prefer to cut your fabric on the fold, try putting it between 2 pieces of tracing paper. Sounds weird I know, but the tracing paper has more grip than silk, which means it will hold those slippery pieces together. To do this, fold your fabric along the grain and pin your selvedges together. Place your folded fabric on top of a piece of tracing paper, and then put another piece of tracing paper on top of that. Pin your pattern pieces on top of the tracing paper, making sure to get all four layers secured, and cut your pattern pieces out.

3) Use silk pins AND pattern weights. For some reason, there is a mindset that you either need to be in one camp or the other when it comes to securing pattern pieces to your fabric, but this really is not the case, especially when it comes to cutting silk and other difficult fabrics.

Most people have their favourite way to secure patterns (mine is with pins) but use both if you have to. I use cans from the cupboard and weigh my pattern piece down in the centre (use as many as you like!), then pin the outsides of the pattern with pins (again, use as many as you like). It might sound a bit overkill, but if you've ever experienced the dread of ruining a lovely bit of fabric, you'll do anything to stop this happening in the future.

4) Which brings me to pins. If you don't have silk pins, and have no plans to buy any, ONLY PIN INTO THE SEAM ALLOWANCE! Pins will leave little holes all throughout your silk that are nearly impossible to make go away, no matter how hard you try to push them closed. And actually, even if you do have silk pins, I would still try to keep them within the seam allowance, just in case!

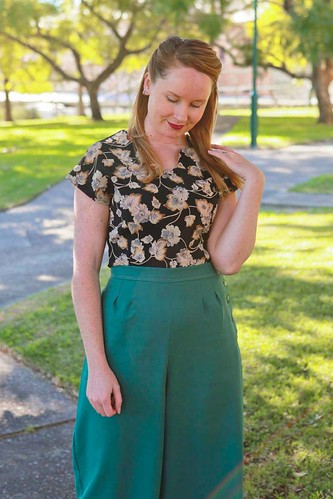
5) When it comes to silky necklines, you should think about stabilising the seam to give it a bit more structure. Silk is designed to flow, so if you have a neckline that needs to hold it's shape like the Afternoon Blouse, giving it a little extra love will help it to retain the original design lines.

Not sure how to stabilise seams? Check out my post here.

6) Take your time! You just can't rush sewing with silk - if you do, it will come back to bite you in the bum. Enjoy the process, listen to the fabric (fabric whisperer?) and you should end up with a lovely garment at the end.

If you have any more tips for sewing with silk, I'd love to hear them! I'm always on the lookout for ways to make it easier (and hopefully not ruin any more beautiful fabric!).

xx
J

Printing & Assembling PDF Patterns...The Afternoon Blouse

Friday, April 11, 2014

If you're new to sewing or dress-making, seeing a PDF pattern can either be the boost you need to get going because it's so instant, or it can be intimidating, because, how the heck does that all work anyway?

As I've just released my first pattern, The Afternoon Blouse, which is currently only available as a PDF pattern, I've written a quick tutorial on putting it together, so you can see just how easy it can be.

Now, the way I've laid out my pattern is a little different to your conventional PDF pattern. Why? Well, I've made it easier!

Instead of having to print out every-single-piece and join them all together in one big lump, I've broken them up for you. You can choose to print out each pattern piece individually, which means if you are only wanting to make one version, you can select the page numbers of the pieces you need, and print out those pieces only. This makes putting your pattern together faster (because you aren't taping a huge sheet together and therefore don't need to rearrange your entire living room to make enough floor space) and it also minimises paper wastage, because you aren't printing out unnecessary pattern pieces. So really, it's a win-win in my book.

Before we get to the printing and assembling bit of The Afternoon Blouse pattern, first you should decide what option you are wanting to make (and you're totally allowed to make both. In fact, it's encouraged!). You'll need to choose the following page ranges depending on the version you are making -

Version 1
Pages 3-5 (Facing Pieces) & 6-23 (Front and Back pieces)

Version 2
Pages 1-3 (Facing Pieces) & 6-14 (Back piece) & 24-31 (Front piece)

Supplies:
Afternoon Blouse PDF Pattern
A4 or Letter printer paper
Adobe PDF Reader Software (free to download here) or other PDF Reader
Tape or Glue
Ruler
Scissors (optional!!)

Steps:

1. Once you've downloaded and saved your Afternoon Blouse pattern and instruction sheet to your computer, open your PDF Pattern and select 'Print'

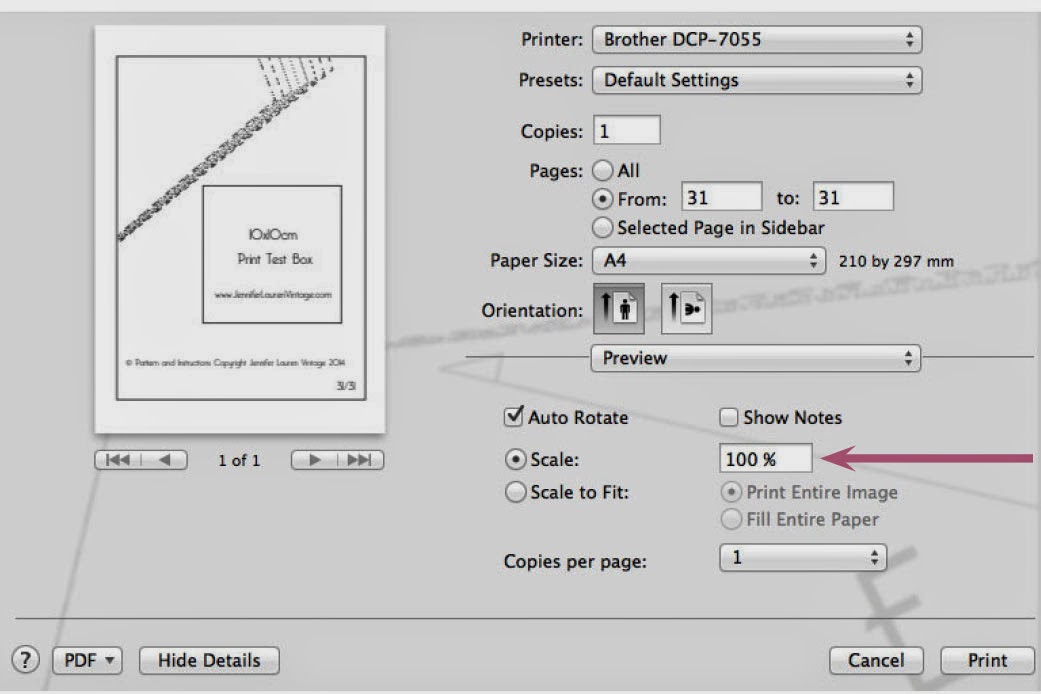
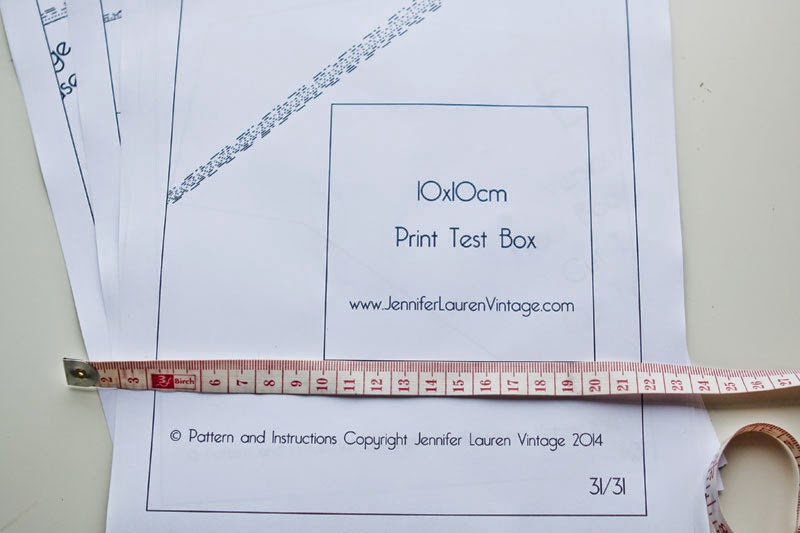
2. In your print options, select 'Actual Size' or 'Scale 100%' depending on which setting you have (I have the Scale 100% setting in my print options) and print page 31. This page has a handy Print Test Box that you can use to ensure you are printing to the right scale. Take your ruler and measure the sides of the box, they should measure 10cm x 10cm.


3. Once your print test box is measuring the correct size, you can go ahead and print out your pattern. You can choose to print just one version by selecting the page ranges you require (listed above).

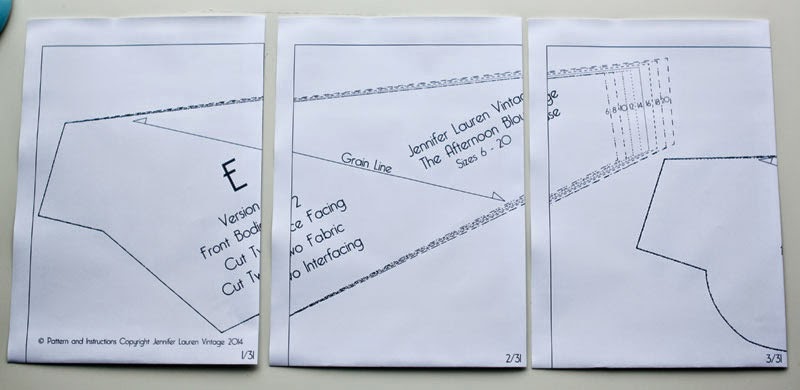
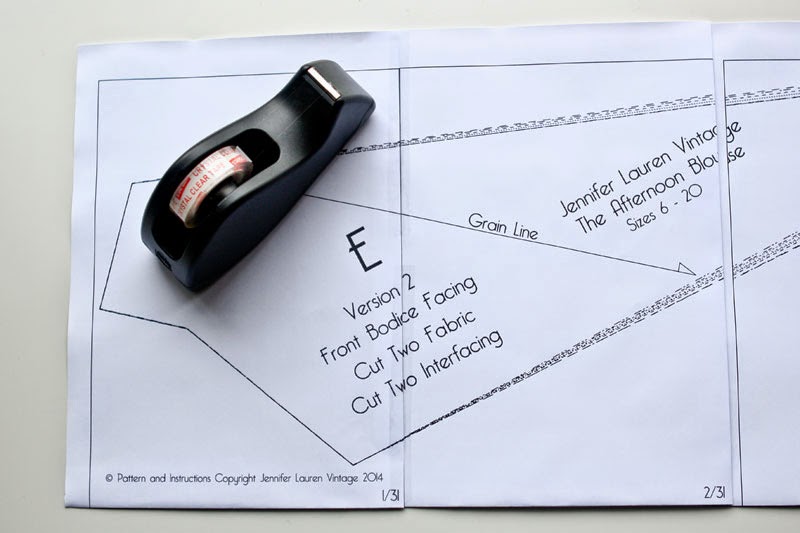
4. Once your pattern is printed, you'll notice that there are page numbers at the bottom of each printed page. To ensure your pattern piece is up the right way, these need to be in the bottom right hand corner.

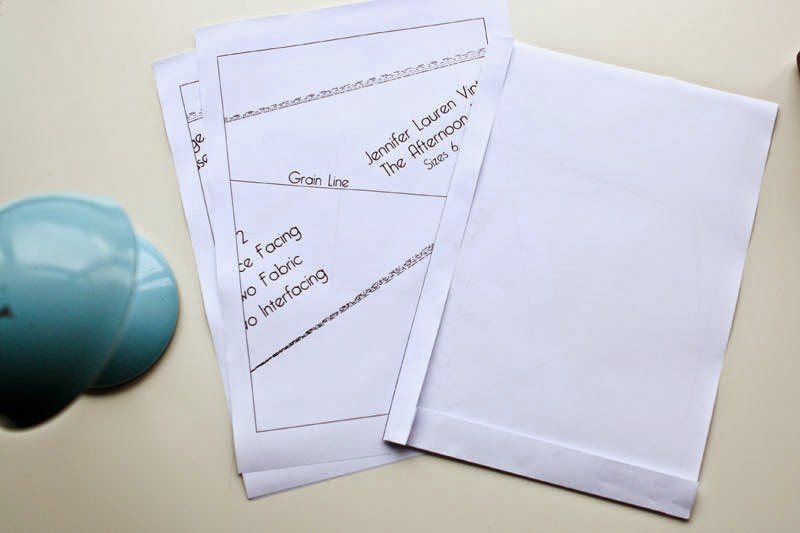
5. At this stage, you can either choose to fold your borders back, or cut them. Fold or cut the bottom side and the right side of each pattern piece in order to make it easy to lay them on top of each other to join them together.


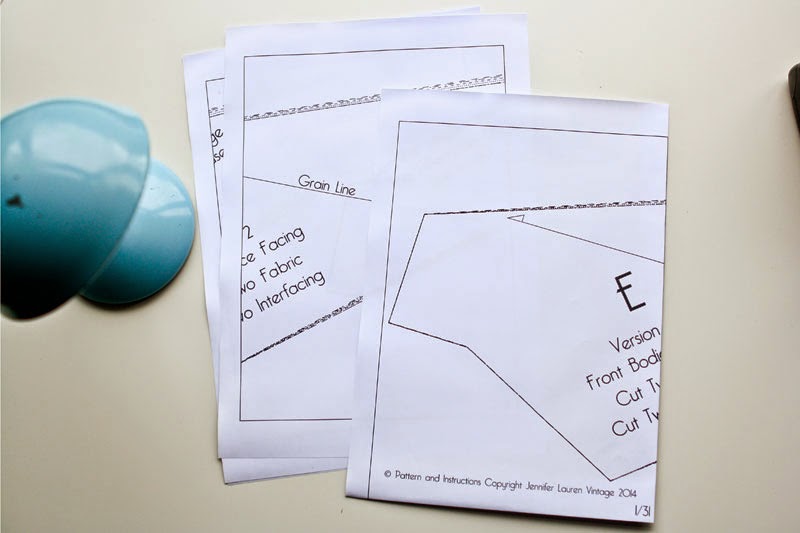
6. On page 3 of your instructions, you'll find a Lay Plan of how you should lay each piece of paper together. Follow this guide and lay out your pieces of printed pattern.

7. Join each pattern piece together, making sure to line up borders and pattern lines from each piece to the next and tape or glue in place.


8. And, erm, that's it! Now you're ready to trace your pattern and spend the afternoon sewing.

xx
J

The Afternoon Blouse is Here...

Friday, April 4, 2014
Well folks, you can now buy your very own Afternoon Blouse pattern right here. Just in time for some Easter Weekend sewing!


Thank you so much for all of your sweet comments last week when I announced that I had been working on my first pattern. It's really rather a nerve racking thing to have worked to hard and spent so much time on something and not know how people are going to react. I said it in my last post and I'll say it again - your comments have been so supportive and really very humbling. THANK YOU!

I've decided that I'm not going to be running a sew-a-long per say, mostly because it's such an easy pattern, but I will be writing a number of posts about the blouse on things like stabilising seams (especially useful if you plan to make the blouse using silks, rayons or other 'slinky' fabrics), pattern hacks (a sleeveless version anyone? Or how about adding waist-ties for a bit more definition if you want to wear it untucked?) as well as a tutorial on printing and assembling your Afternoon Blouse Pattern as I've chosen to lay my pattern out a bit differently to other PDF patterns, which hopefully means it's easier to put together and you'll have less paper wastage!


So, ummmm, I guess all there is to do now is go get your own copy of the blouse, find that amazing vintage button that for some reason you only have one of, set aside an afternoon and get sewing, huh?

If you make an Afternoon Blouse, well, I'd REALLY like to see them, so please let me know if you've blogged about one, or feel free to email me a picture :)

Yay!

xx
J
The Anna Blouse...

Monday, March 24, 2014


I'm having a bit of 'blog' writers block at the moment. There's a lot to say, but words just aren't coming easily this week. So, a short and sweet sewing blog post with mostly pictures will have to suffice this time round.

This is the Anna bodice turned into a back button-up blouse. Pretty sweet huh?

I actually made and took photos of the blouse before we moved into our new house. I was hoping to find the time to make up a tutorial to go along with this post but unfortunately, that just hasn't happened yet.  If you would like to know how I did it, let me know in the comments and I'll rustle up a tutorial for you.


And just quickly, while we're on the subject of the BHL ladies, have you seen their kickstarter page? I've had the honor of meeting (and fabric shopping with) Elisalex and Charlotte, and they are such lovely ladies! There are some pretty sweet goodies available for all pledges (big and small), so if you can pledge anything towards their project, you can do so here

I'll be back this week with a sneak peek of what's been eating up my life at the moment (and has taken up all my words. And it ain't just the house, though that has been taking up plenty enough on it's own). Can't wait to share...

xx
J

Building & Wearing a Hand-Made Wardrobe - Back to Basics

Friday, February 7, 2014


I'm so glad so many of you enjoyed my first post in this series of Building & Wearing a 
Hand-made Wardrobe!

Today I wanted to talk about going back to basics in our hand-made wardrobes, to talk about those items that we can make in a few hours that can form a base for several hand-made outfits.

Basics are pretty amazing things when you actually think about them. They take very little of our precious sewing time to make up, but open up a whole host of different hand-made outfits that can then be worn because of them.


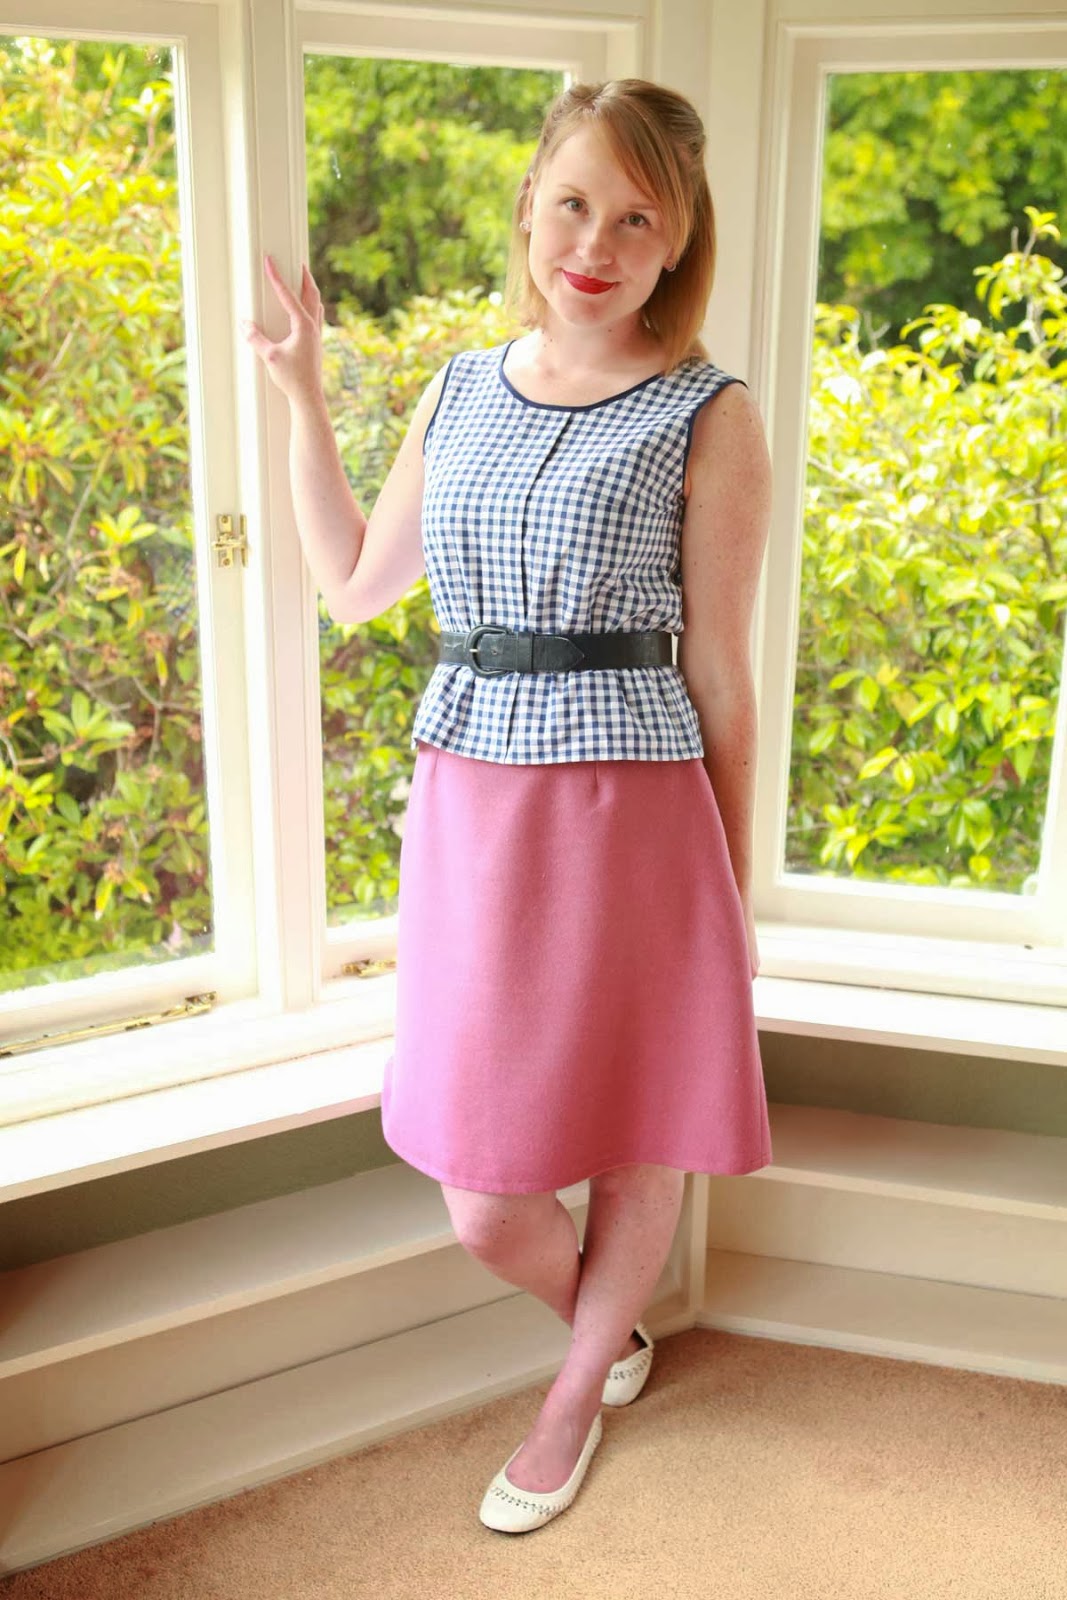
Today I'm wearing a Colette Patterns Sorbetto (free to download!) that I've turned into a little peplum blouse. There are so many free basic patterns out there that are easy to sew up, to adapt and that can provide the means to wear some of the more outrageous items in our hand-made wardrobes that may otherwise never get worn because nothing else goes with them. 

As I discussed in my first post in this series, sewing basics doesn't have to be boring or mean doing the same techniques over and over. Basics provide the amazing opportunity of interpretation, customisation and personalisation of a garment. They also provide the perfect platform to try more complicated construction techniques and to test out different design ideas, while also letting you try out new styles without too much heartbreak if they just don't work out.


This little Sorbetto took me about 3 hours to make all up (if that), has french seams and the obvious addition of the peplum. I can wear the peplum out as I've done here or tucked in (and I've found that tucking in the peplum means I have a perfect distribution of 'pouff' out of the top of my skirt, which means I'm not forever adjusting my blouse). This little blouse also goes with so many things in my hand-made wardrobe and is the perfect summer staple being made up in a navy gingham cotton which is both affordable and easy to wash and wear.

Throughout the year I'm going to be showing you a few different things you can do to jazz up basics, including how to make your very own Peplum Sorbetto coming next week (it is so easy)!

So, if you're one of those people who loves sewing bright, complicated garments that never get worn, then maybe try sewing up a basic to go with it! You never know, it might get worn a whole lot more and become a staple go-to outfit.

xx
Jen

The Summer Sewing List...

Thursday, December 5, 2013
Going into each new sewing season, I normally have quite a clear list of what I'm going to endeavour to make. Having a list makes it so much easier for me to stay on track and actually finish projects rather than abandoning them at the last stitch (I really dislike hemming, I don't know why...).

This year though, I'm really struggling to A) narrow down the list of patterns I could sew and B) decide on what fabric to actually make up said patterns.

I think I'm suffering from a bout of too many patterns, too much fabric (TMPTMF) syndrome. It might have something to do with moving countries, going on an extended travel adventure and then coming back to a summer that is not like the long hot summers I got used to in Sydney. Unfortunately the summers here can be a bit iffy, you're never really sure whether you are going to wake up to tights & cardigan weather or summer dress weather.

Having said that, I have managed to compile a small list to gently ease me back into sewing (and making decisions!):

1) BHL Anna Dress in Cherry Red


I really love the 1940's lines in the Anna dress, and after seeing so many amazing versions of this dress on the internet, I'm quite sure this is the first thing I'll be making.

I found the fabric for this on a recent trip to my favourite charity shop haunt and I'm planning to make the knee length version with a slash neckline. Although, I haven't decided whether to keep the sleek skirt or 50's it up with a full gathered skirt and pockets. Suggestions most welcome!


2) Sweet 1950's day dress in textured sky blue


I've had this lovely little 1950s pattern for a while now but could never decide on what fabric to use.  I found this length of textured sky blue mystery fabric on the same trip I found the cherry red fabric for my Anna dress and thought the two would make a simple but classic summer combo. I'll need to wear a slip under the dress as it is a little sheer with the textured lines in the fabric, but I am looking forward to finally making this pattern.


3) 1940's inspired tie front blouse in white with red polkadots


I may not use this 60s pattern for the blouse as I have another actual 40's pattern that I'm tossing up using instead. Both will require some pattern drafting to get the shape I want as well as the right amount of fabric at the bottom for the ties, but I am loving the little peter pan collar on this 60's version.

I am yet to find the fabric for this, but I'm thinking a little red polka dot cotton lawn will look quite lovely.


4) 1940's inspired peasant dress (View 3) in navy blue cotton


This is actually a 70s pattern that I found about a week ago hiding under the table of a little shop I had no idea existed (even after having lived in the area for some time just before we left for Sydney). I think it has a definite 40s vibe about it and looks like the perfect dress to throw on on a warm summers day.

On top of some mending I have to do on 2 vintage skirts I bought in Edinburgh, I am also hoping to make a 1940s slip or two (with a tutorial), a 1930s inspired silk camisole (also with a tutorial) and a few other bits and pieces that I haven't yet decided on.

I'm also about to begin the process of making my first experimental pattern, a simple and wearable 1940s inspired jersey top that is certainly going to test my pattern making skills (or lack there of if I'm completely honest!).

So, what do you guys currently have on your sewing lists? Have you ever suffered from TMPTMF Syndrome?

xx
Jen

The Darling Buds of Mae...

Friday, August 9, 2013
I was lucky enough to be asked to test another Blue Ginger Doll pattern a few months back and now that it's been released, I can finally show you my version of Abbey's newest pattern, the Mae Blouse.
Mae8

Mae11

Mae1


It's a beautiful 1940s inspired blouse with a scalloped neckline (who doesn't love a good scallop, of the edible and patterned variety!), a button up back and a lovely fitted silhouette.

I made my Mae using a vintage mystery fabric that I'm pretty sure is a silk georgette with some beautiful vintage shell buttons. I actually had this combination saved for another 40s button up blouse that I hadn't quite gotten around to making yet, but as soon as I saw Mae, I knew they would be the perfect match for each other.

Mae16

Mae6

Mae3

Abbey recommends using a stiffer fabric for the blouse to support the scallops, but so that I could use my lovely fabric, I used interfacing on both the blouse scallop and the scallop facing to give it the structure it needed, and it seems to work really well.

I'm wearing my Mae tucked into my 1940s Swing Pants, but Abbey has designed the pattern so that you can make it longer and wear it over the top of a pencil skirt (very 40s!) or with jeans for a more modern look.

Mae4

Mae7

Mae12

Mae9

This pattern is such a quick and satisfying make - I made mine in less than a day all up. It's also the perfect pattern for a beginner looking to start adding new techniques to their repertoire like button holes and scalloped edges.

Right now Abbey has 10% off the Mae Blouse pattern using the code LOVELYMAE2013 and she has free world wide shipping! So there are no excuses not to add this beautiful pattern to your stash. And while you're at it, you may as well get the Billie Jean dress pattern too, I wear mine all the time!

xx
Jen

Auto Post Signature

Auto Post  Signature