

This is a pretty straight forward adjustment and really, the hardest part is figuring out just how much you want to take off. But, because we're dealing with stretch fabric, this number doesn't have to be as precise as when you're adjusting the bust on a woven garment.
Please note - all adjustments should be done without the seam allowance. And although this tutorial is showing you on the cropped version, it is exactly the same for the long line version.
You'll need -
- Your Juniper Cardigan Front bodice piece
- A Juniper Cardigan Muslin
- Tape measure
- French curve (or a curved ruler)
- Pens & paper
Steps -
1. On your Juniper Front Pattern piece, you'll notice that there are two handy little notches along the centre front, circled below. The first notch is called the First Button Notch on your pattern, and the second is called the Under Bust Notch.

2. Take the muslin of your Juniper cardigan and between the two notches circled above, pinch out the excess over your full bust, tapering to nothing at the under bust notch. Using a french curve, transfer this to your front bodice pattern piece, keeping the length of this measurement handy - you'll need it later!


3. Trim off the excess shaping.

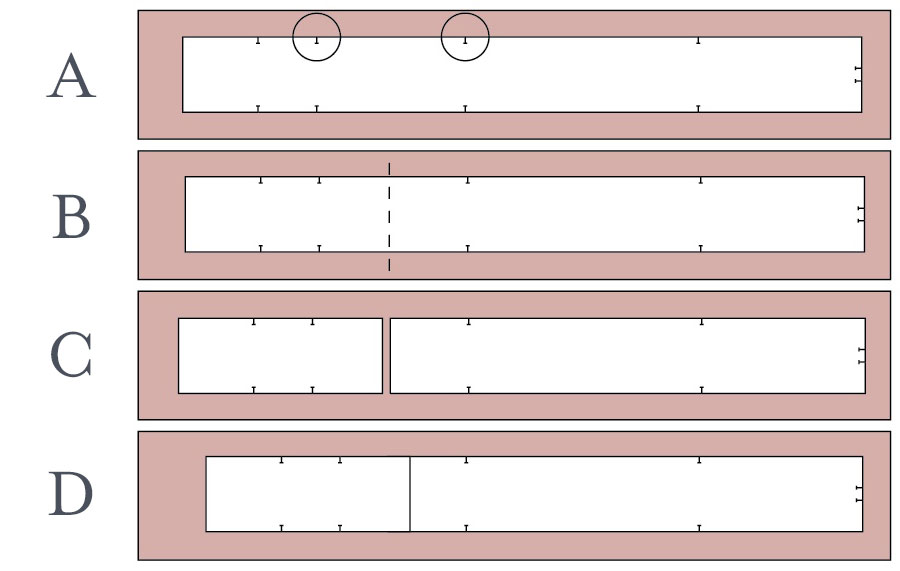
4. Now you need to shorten your neckband piece - you will find the neckband pattern piece has corresponding First Button and Under Bust Notches (circled below, Figure A).
Measure the length between these notches, then minus the measurement you had from step two to get the difference you'll need to remove.
For example, if the current length is 10cm, and you had a measurement of 9cm, 10 - 9 = 1cm. You will be removing 1cm from the length of the neckband.
Cut a line between the notches (Figure B) and overlap the required amount then tape in place (Figure C & D).
Now you can make up your Juniper Cardigan as normal, with reduced shaping and excess fabric around the bust. Easy!
xx
J


Post Comment
Post a Comment
Thank you so much for stopping by to leave me a comment, like most people, I really do appreciate them all!
Due to the large amount of spam I receive here, unfortunately I have had to turn comments off. If you'd like to get in touch with me, please send me an email :)
Note: Only a member of this blog may post a comment.