

The binding on the Felicity Dress is a visible binding, which means you'll see the binding on the finished dress. This means you can use a contrasting binding for a little added detail, or use the same fabric or colour for a more invisible finish.
You can either buy your bias binding or you can make your own using this tutorial - I've opted to make my own using the same fabric as I've used for the bodice of my final Felicity dress.
Steps:
1. Take your binding and wrong-sides together, press in half.


2. Gently open out your binding, then wrong sides together, take the outer raw edges and press them in towards the centre, dividing your length of binding into 4 even sections (or 3 pressed lines).


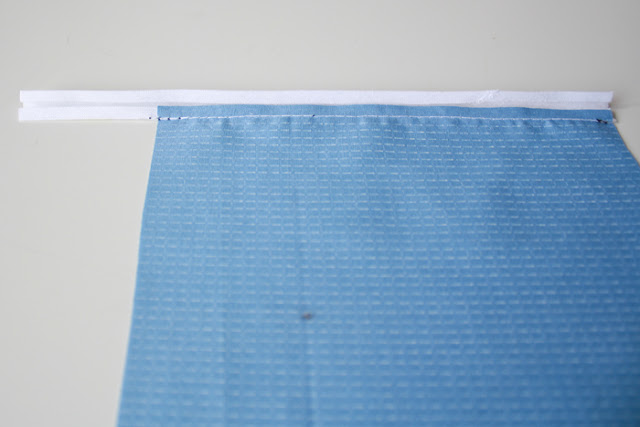
3. Gently open out your binding and right sides together, line up one raw edge of your binding with the raw edge of your neckline or sleeve. Pin in place.
Note - when attaching your neckline/armhole binding, leave around 2 inches spare at each end just in case. If you want to get a little fancy with your back neckline finishing, which we will be talking about next week, leave more (3 inches plus!).


4. Attach your binding to your neckline/arm hole by stitching along the pressed line closest to the raw edge. You will be 'stitching in the ditch' as one of my testers rightly pointed out :)


5. Once your binding is attached, press your binding up and over your seam allowance, folding the binding in half.


Tuck the remaining raw edge of your bias binding up and under, into the inside of the binding.
6. With the wrong side facing you, pin down your binding and then using either an invisible hand stitch or a sewing machine, secure your binding down.


Finishing the Armhole Binding
7. When attaching your binding, start from the bottom of the armhole at the side seam. Stitch all the way around leaving your excess free.

8. Pin your excess binding horizontally together, as close as you can get to your bodice seam.


9. Stitch you binding closed and trim down excess.

10. Finish as you would in steps 5 to 6.


Next week I'll be showing you some cute ways to finish off your back neckline bias binding, until then...
xx
J


Thank you so much for this. I am a beginner and boas binding daunts me. I am about to do it for the second time. I will have you with me this time!
ReplyDeleteHello Iris, you're welcome :) Let me know if you need any more information, I'm more than happy to help!
Deletexx