Image Slider

Showing posts with label Felicity Dress. Show all posts

Your Felicity Dresses...

Sunday, December 13, 2015
Hello, hello...

Today I wanted to share some of the lovely Felicity Dresses I've seen around the blogoshere since releasing the pattern. Before I get into it though, I wanted to let you all know that my dear friend Caitlan (who runs Indie Stitches) is now stocking my pdf patterns as well as the paper Bronte Top pattern! Caitlan is in Australia and has some gorgeous indie patterns in her store and come early next year, she'll be stocking a beautiful selection of fabrics as well. I've been lucky enough to have been given a sneaky peek and there are at least four I want straight off the bat.

I'll be adding more suppliers next year and will keep you updated as my little list grows so that you know when one pops up that is close to you. On that note, if there is somewhere in your area that you would like to stock my patterns, please let me know so I can get in touch with them in the new year :)

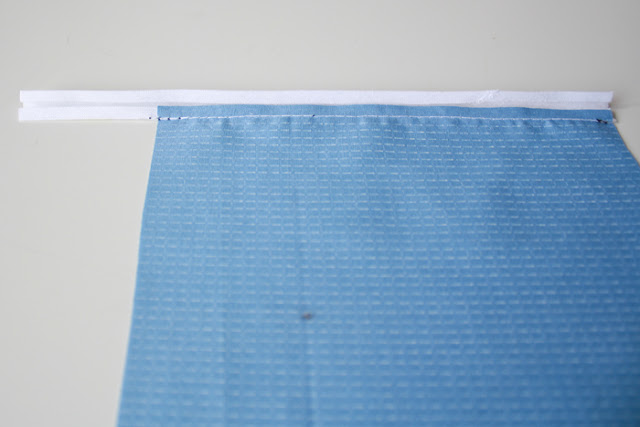
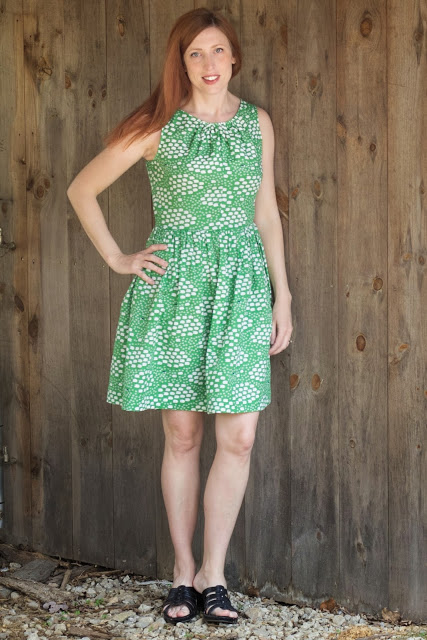
Anyway, let's ooh and ahh over some beautiful Felicity's shall we?


I'll be back this week with a free pattern for ya'll! Just in case you've left holiday gift making to the last minute, this may help you out :)

Talk soon,

xx
J
Shop Patterns     .     Instagram     .     Newsletter      .     Facebook    .     Pinterest   .   Podcast

My Final Felicity Dress

Tuesday, November 17, 2015
Hello all!

Well, first of all, thank you so much for all of your comments on my last post. I did try to make it light hearted, but it's still a serious thing and I'm glad I've either reminded many of you to go and have a check up, or have alerted you to take a closer look at that little skin thing you've had for a while that hasn't gone away yet. It could be as harmless as contact dermatitis, or it could be a little more cause for concern. Either way, go get 'em checked!


Now, let's move onto some harmless fun, here is my final Felicity Dress from the Sew Along! I took these the day before my BCC was taken out.

I really do love this dress and the colour combination, it just feels fresh and summery and like I should be eating a massive ice cream on the beach (I wish...).

The only issue is that it's really not very breast feeding friendly, and since I cut it in my usual size, it's a wee bit tight around the bust and waist at the moment (and my boobs are such different sizes right now too! Really, I had no idea this was a thing until it happened to me. It's so much tighter on one side than the other! But I've been assured by many people that they will go back to normal, here's hoping...). This means I probably won't get much wear from it for a little while at least, but I can still look at it and pretend...


There's not really much to write about the dress itself, since I think everything was petty well documented in the Sew Along (?), but if you have any questions, feel free to sing out in the comments :)

Have you sewn up a Felicity Dress? I'd love to see it, I'm hoping to do a little blog round up soon, so leave a link in the comments to yours if you'd like to be included.

xx
J
Shop Patterns     .     Instagram     .     Newsletter      .      Twitter     .     Pinterest

3 Ways to Finish a Bias Bound Neckline

Tuesday, October 27, 2015

Hello Everyone!

Let's talk about a few different ways you can finish the back edges of a bias bound neckline - one of the last things you need to do on the Felicity Dress.

As always, there are a number of different ways you can do it, the following are just three of my favourites...

Hook and Eye

This is the simplest method of finishing off your neckline and results in two straight edges held together with a hook and eye.


1. Gently open out your bias binding, wrong sides together, tuck the raw edge in.


2. Press your bias binding back into it's original folds, leaving a nicely folded end with no raw edges.


3. Fold your binding over to the underside of your neckline, and hand stitch down.


Note - my binding is quite long because I was leaving extra length to show you the next two ways to finish it. Feel free to make it shorter (or longer!!).

4. Repeat for the other side and finish with a hook and eye.


Button and Loop

This method is very similar to the hook and eye method, except that instead of folding your bias binding over completely, you leave a little loop on one side to go around a button.


Note - you can modify this method using the plain hook and eye edges and adding a ribbon or your own threaded cord as the loop.

1. Follow all steps for the Hook & Eye method above for one side only. If you've inserted a lapped zip, make sure you leave the 'lapped' side of the zip free.

2. Instead of folding your binding all the way over, fold it in half, so that only a small amount is lapped over to the wrong side of your garment, and set it at a slight angle down. Hand stitch in place and sew a button onto the other side.


Bow and Snap Fastner

I think this is a lovely little detail that is so easy to add to a neckline - this is the method I chose for my final dress...


1. Follow all steps for the Hook & Eye method above for one side only. If you've inserted a lapped zip, make sure you leave the 'lapped' side of the zip free.

2. Instead of folding your bias binding to the underside of the dress, fold it over to the right side and hand stitch down.


3. Take a needle and thread and secure the thread to the binding in the middle of the 'bow' by passing through it once.


4. Wrap your thread around the bow until you are happy with how it's looking, then knot off your thread at the back. Stitch on snap fasteners.


Do you have a favourite method of finishing off bias bound necklines?

xx
J

Shop Patterns     .     Instagram     .     Twitter     .     Pinterest

Making and Attaching Bias Binding - The Felicity Dress Sew Along...

Monday, October 12, 2015

Today I'm talking about making and attaching the bias binding to your Felicity dress neckline and armholes.

The binding on the Felicity Dress is a visible binding, which means you'll see the binding on the finished dress. This means you can use a contrasting binding for a little added detail, or use the same fabric or colour for a more invisible finish.

You can either buy your bias binding or you can make your own using this tutorial - I've opted to make my own using the same fabric as I've used for the bodice of my final Felicity dress.

Steps:
1. Take your binding and wrong-sides together, press in half.


2. Gently open out your binding, then wrong sides together, take the outer raw edges and press them in towards the centre, dividing your length of binding into 4 even sections (or 3 pressed lines).


3. Gently open out your binding and right sides together, line up one raw edge of your binding with the raw edge of your neckline or sleeve. Pin in place.

Note - when attaching your neckline/armhole binding, leave around 2 inches spare at each end just in case. If you want to get a little fancy with your back neckline finishing, which we will be talking about next week, leave more (3 inches plus!).


4. Attach your binding to your neckline/arm hole by stitching along the pressed line closest to the raw edge. You will be 'stitching in the ditch' as one of my testers rightly pointed out :)


5. Once your binding is attached, press your binding up and over your seam allowance, folding the binding in half.


Tuck the remaining raw edge of your bias binding up and under, into the inside of the binding.

6. With the wrong side facing you, pin down your binding and then using either an invisible hand stitch or a sewing machine, secure your binding down.


Finishing the Armhole Binding

7. When attaching your binding, start from the bottom of the armhole at the side seam. Stitch all the way around leaving your excess free.


8. Pin your excess binding horizontally together, as close as you can get to your bodice seam.


9. Stitch you binding closed and trim down excess.

10. Finish as you would in steps 5 to 6.


Next week I'll be showing you some cute ways to finish off your back neckline bias binding, until then...

xx
J

Auto Post Signature

Auto Post  Signature