

Willa is designed to be a wrap coat tied with a belt at the waist, so you absolutely don't have to add any closures into Willa if you don't want too. If you want the option of the cosy funnel neck though, you will need to add some sort of fastening there.
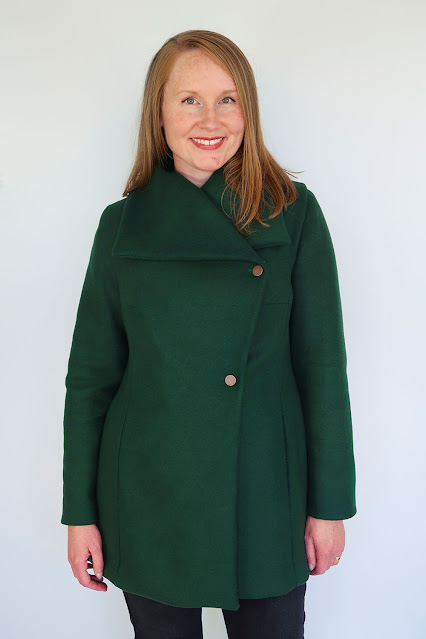
The waist button was added for extra security, since the waist does get quite a bit of additional strain put on it during wear and if you want to, you can add in an additional button between the two current ones for more security across the bust.
Fastening Options
You don't have to use buttons as a closure on Willa - especially if your machine will struggle with inserting button holes (mine only just put up with it!). You can use toggles, coat snap fasteners or for a completely clean look, use coat hooks and eyes so that the fastenings aren't seen at all.
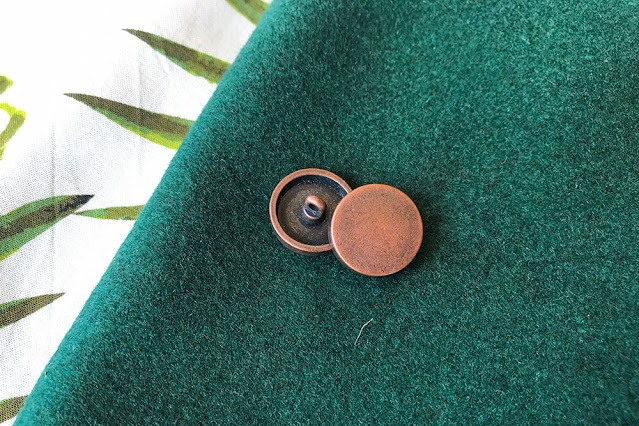
I opted to go with copper coloured metal shank buttons for my Sew Along Coat. The shank in the button means there is plenty of room underneath the button for my thick fabric to sit under. This leaves a smooth finish to the outer coat, rather than if I had chosen to use a flat button - which would have lifted above the thickness of my coat fabric, leaving an indent and meaning that my closure wasn't as secure. It would also have out a lot of additional strain on the thread holding my button on.
I also recommend using an anti-fray glue on your button holes for extra strength and durability, even if you are using a fabric that doesn't fray easily like mine. It just means that you're making sure your coat will last you many years of frequent wear, and buttonholes are prime areas for early degradation of garments. If you're spending this much time and effort making a coat, then this is well worth the investment.

Inserting Buttonholes
1. Try your coat on and make sure you're happy with the fastening placements indicated on the coat pattern. You are able to move these up or down, or back and forth to suit your individual body. I choose to mark my buttonholes with Tailor's tacks. Once they're snipped to open out your pattern though, I do like to go back in and mark them. This is because, depending on how long your buttonhole needs to be (depending on your button size) you can use the tack as a guide to get straight buttonholes!
It's very easy to get a little wonky when sewing in your buttonholes, but using the tack as a guide, you'll never have wonky buttonholes again.


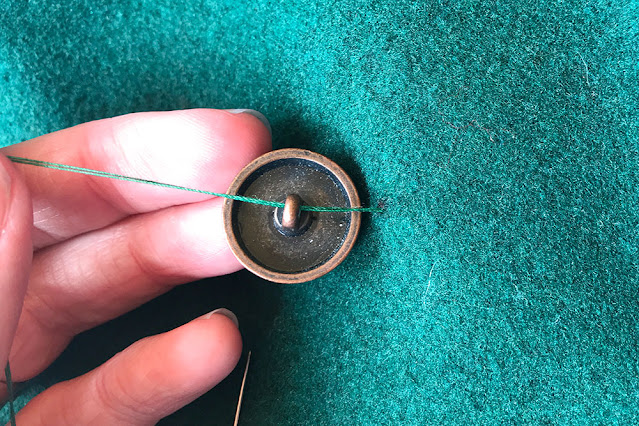
Attaching Buttons


Post Comment
Post a Comment
Thank you so much for stopping by to leave me a comment, like most people, I really do appreciate them all!
Due to the large amount of spam I receive here, unfortunately I have had to turn comments off. If you'd like to get in touch with me, please send me an email :)
Note: Only a member of this blog may post a comment.