Image Slider

Showing posts with label Jennifer Lauren Vintage Patterns. Show all posts

Attaching All-in-one yoke pockets

Monday, August 17, 2015

I really love these all-in-one yoke pockets on the Felicity Dress - I don't know what it is, but I think they're cute and they work perfectly every time. Today we are attaching them to our Felicity skirts and talking about whether to top-stitch, under-stitch or just leave the outer edge as is.

Also, you can't tell but I'm using a mini version of my Felicity Pattern to illustrate the next few sew along posts, I'll have to show you the final dress at the end because she's so darn cute!!

Steps:

1. When cutting out your pocket pieces, make sure to mark all of your notches, and don't forget to include a little notch down the bottom in the dip of the pocket (indicated by red arrows). These will really help you later on when you need to be very precise when folding the pocket over, as the 'back' of the pocket makes up a section of the overall waist line of the skirt.

This is especially important when making the circle skirt version, as there isn't as much room for error as there is with the gathered skirt version.


2. Right sides together, place your pocket piece on top of your skirt piece. Making sure you line up your curves.


1.5cm ( 5/8inch) from the raw edge, stitch your pocket curve together, back-tacking at the start and end of the stitch.


3.  Cut little notches into your seam allowance along the curved edge, being careful not to snip too close to your stitched seam, then turn right sides out and press.

Note - Those little cuts you made allow the fabric to sit much neater along the curve by releasing the tension from the fabric threads.


Now is the stage where you'll want to decide whether you under-stitch, top-stitch 
or leave the outer pocket seam as is...

You really can do what ever you like here, it's completely up to you (and whether you have the patience to add a small extra step - sometimes I do, sometimes I don't... hehe).

The two big reasons to either top-stitch or under-stitch is that first you'll be be providing a little extra stability to a seam that does get a lot of strain put on it since your hands could be going in and out of your pockets a lot. Secondly, they are securing stitches, meaning your pocket bag will stay nicely inside of your pocket along that stitched edge, rather than poking up, as you may find they have a habit of creeping out. Adding the extra stitch also means that your outer pocket seam will stay nice and crisp, even after washing.

So, what's the difference between top-stitching and under-stitching? It's pretty self explanatory, but top-stitching is stitched on top so you can see it on the outer garment. You can choose to use a matching thread to make it more invisible or go for a decorative touch and use a contrasting thread or stitch - you absolutely don't have to use a straight stitch like I've done on my mini-Felicity sample. If you have fancy stitches on your sewing machine, why not try them out? Or even try a little zig-zag?

An under-stitch is where you secure your seam allowance to the underside of the pocket, which is something you may want to consider if you prefer a really clean garment with as few seams showing as possible, while still providing that security and stability of adding an extra stitch.

Adding a Top-Stitch:

3mm (1/8in) from the outer seam edge, place a line of stitching along the curve, securing both the skirt and pocket seam down.


Adding an under-stitch:

Note - Adding an under-stitch to the curved pocket of the Felicity Dress is a little tricky due to the curve, but it is possible. I've chosen to use a flat sample in order to show you how to do it in a much clearer manner. The blue fabric is the skirt, the white is the pocket as per the rest of the post.

1. Open up your pocket seam and press the seam allowance toward the pocket.


2. Place a line of stitching along the centre of the seam allowance securing it to the pocket side (indicated by the red arrow).


 3. Fold your pocket back under, wrong-sides together and press. You won't see the seam from the outside...

But there will be a neat line of stitching on the inside of the pocket...


And back to the sew along...

4. Fold your pocket bag in half along the centre line. You'll want to ensure your pocket is folded in half exactly along the fold line marked on the pattern - use the notches you made in your pocket at the start to match these up (indicated by the red arrows) as well as the edges of the skirt. 


The two notches made towards the outer edge of the pocket should match up with the ends of your finished pocket edge, as indicated by the arrows below.


5. 1.5cm (5/8in) from the raw edge, stitch the bottom of your pocket bag closed. This should be loose from the skirt, so make sure you don't accidentally attach the two!


6. Within the seam allowance of 1.5cm (5/8in), baste the top and sides of your pocket to your skirt and press.


Repeat for the other pocket and voila, your cute lil all-in-one yoke pockets are done! I used the pattern for the gathered skirt in this post, but the process is exactly the same for the circle skirt.

 If you have any questions, please pop them in the comments :) Otherwise I'll see you next time, where we'll be assembling the skirt and gathering it if you are making version 2 of the Felicity dress.

xx
J
Shop Patterns     .     Instagram     .     Twitter     .     Pinterest

The Enid Sweater - New Pattern Release!

Tuesday, December 2, 2014
I've been working on this pattern for months and months and I'm so happy to be able to finally put it out into the world -


I'd had the idea for a while now, ever since I took part in my first Me Made May in 2013 where I'd get lots of questions about where all of my cropped cardigans and sweaters came from. Since they're pretty much all vintage items, I'm afraid I was rather unhelpful. So, it occurred to me that there may be a few people out there, who are handy with a sewing machine and who might just appreciate a quick make, reminiscent of those cute vintage sweaters.


Enid has been designed with those in mind who might want fitted vintage sweaters, but can't find them and have neither the time nor the inclination to knit one. 

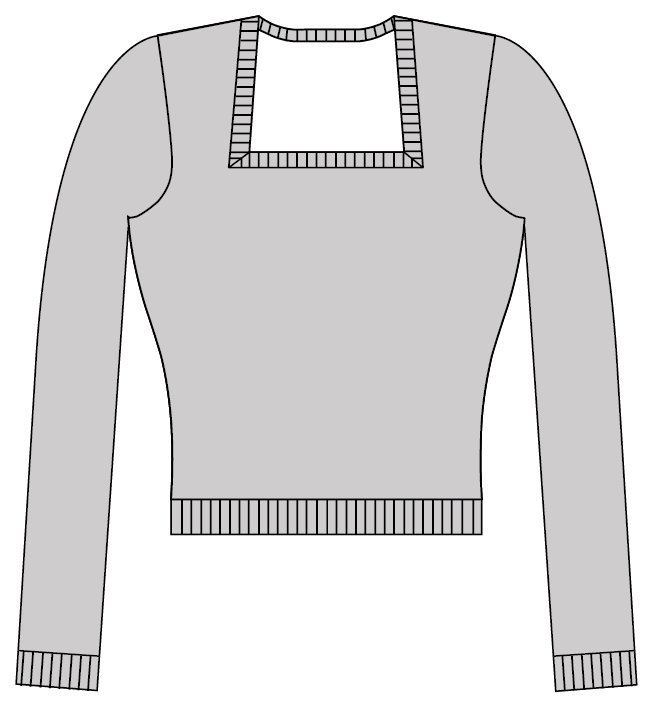
Enid is practical and warm, designed to be made with soft, snuggly zero-stretch sweatshirt fabric. The cropped length means that you can wear it with all of your high-waisted dresses, skirts and pants. The two different necklines, an angled square or a lightly rounded V-neck, make it easy to switch it up depending on your mood.

Due to the bias cut bodice, Enid is a flattering sweater that hugs you in all the right places and has you covered, whether you're out walking the dog or about to head inside to read by the fire.


And in other news... I've added bigger sizes! I've been meaning to add bigger sizes to my patterns for a while now and decided that Enid was the perfect opportunity to do just that. So, I've added 2 new sizes to the upper end of the range and now cover sizes from an NZ6 to 24. I will also be going through my back catalogue to add those sizes to my older patterns soon.

Since Enid is a fitted sweater, if you prefer a looser fit, more appropriate for layering, I'd suggest going up a size.


I will be providing tutorials in the New Year for adding more room for fuller busts as well as a guide for attaching the neckline bindings, which are the trickier steps to making up Enid.

Other than that, Enid is a quick make, just in time for the cold weather blast (in both the Northern Hemisphere AND the Southern one. I swear summer has decided to go on holiday down here...).


Enid is now available in instant, downloadable pdf form, in my easy to print, use and put-together format (no more rearranging your living room!). 


I hope you enjoy :)

xx
J

SALE - 15% OFF ALL PATTERNS!

Friday, November 28, 2014
 Jennifer Lauren Etsy

Well, it's nearly Black Friday/Thanks Giving, and although NZ doesn't actually really do either of those things, since so many of you live in places that do, I thought I may as well get in on the fun :)

So, for this whole weekend, I'm giving you 15% off all patterns in my Etsy shop using the code THANKYOU (all one word) because really guys, thank you! It's been a rather amazing year, both personally and professionally and I'd really like to thank you all for that.

The code expires on Sunday, so if you've been meaning to get yourself a little something, there's no time like the present. And if I may say so, from what I've seen on my instagram feed, not many of you will be straying too far from your houses due to a bit of that cold, white, wet stuff.

Stay tuned for a little something fun on Monday and have a lovely and cozy Thanks Giving to those that celebrate it and a lovely, cozy weekend to those who don't.

xx
J

Gettin' in the Way...

Monday, November 17, 2014

Well, there certainly hasn't been much sewing around these parts lately has there? I'm of the opinion that this isn't a bad thing though (right?). Sometimes you need a break from doing the things you love lest you get a visit from the dreaded burn out.

David and I have been back from visiting family and hanging out in the glorious Sydney weather for a week today (you can now call me Ms Dr. Jennifer Lauren #notthatkindofDr). I've pretty much tried to avoid the internet and sewing during this past week, mostly because my sewing room and computer have become uncomfortably attached to my leg over the past few months, not from blogging (obviously) but with the responsibility that comes when you release a sewing pattern (or two...). I really love answering emails and questions I get about my patterns - to the point that almost as soon as I get one, I'll answer it within seconds if I'm not asleep and close to my computer (and will be one of those annoying people tap-tap-tapping away on their phone if I have to). I feel a big responsibility to those people who are buying my patterns, and I want to provide the best customer service that I can.

This, however, is sort of leading to a tiny bit of the aforementioned burn out.


While we were away, we stayed with my parents for a long weekend. They live about 20minutes out of the city I grew up in, in a small community filled with native trees and beautiful bird song and are severely lacking cell phone coverage. Now, contrary to what some might think, we don't live in hobbit holes or mud huts in NZ. We're a westernised country with internet, and cell phones and heck, even Starbucks infiltrated when I was still in high school. And this little place in NZ is only a handful of well habited places that lacks cell phone coverage.

I have to admit though, it was lovely. Normally the first thing I do when I wake up is reach over for my phone to check my emails. I couldn't do that there. I had to wait until we'd driven over the hill, into the township to get at my inbox.


In Sydney, while we had internet where we were staying, I didn't have cheap access to internet when we weren't there (and we were very rarely there. We literally came home to sleep, and spent the days catching up with friends and eating our way around Sydney). So, when I may normally have checked my phone for emails or convo's on the train back and forth between various Sydney suburbs, I couldn't, unless I wanted to pay a pricey premium (uh, no thanks...). This meant that I had only set times I could check emails, and most of the time, once we had arrived back to our accommodation, we'd chat to my friends (who we were staying with) and then promptly crash out for the night to get ready for the next busy day ahead.


I've been trying to keep some of the same distance that was forced on me during our time away (and honestly, failing slightly miserably).  But it's been a good lesson in being constantly available. Nobody can sustainably be constantly available.

Life gets in the way, as it should.

xx
J

Introducing The Cressida Skirt Pattern

Thursday, October 16, 2014


View 1 - Front
View 1 - Back


It's an age-old conundrum for seamstresses across the world - what do you love more? Buttons or pockets? Well, why do you have to choose? Your love affair with both buttons and pockets need no longer be kept a secret, as you show both your craft and love in the ultimate skirt, Cressida.


View 2 Cressida Skirt worn with a Long Sleeved Bronte Top

Cressida is a gently flowing semi-circle skirt with your choice of a single or double breasted button placket, sweet button belt tabs and inseam pockets, which means you certainly won't disappear into obscurity.

Any number of different fabrics can be used to make your Cressida skirt, from breezy summertime linens to cozy woollen fabrics worn tucked up by the fireside. Deep pockets leave plenty of room for hiding all of your treasures, tokens and secret love notes.


It was bound to happen wasn't it? It's no secret my love of a circle skirt and a button or two, so why not combine the lot, add in a pocket and call it a day (or a Cressida).

So, what do you think?


xx
J

Auto Post Signature

Auto Post  Signature