Image Slider

Sewing Your Cake (and wearing it too)…

Monday, April 29, 2013

A snippet of my sewing space. That strawberry tart was delicious by the way...

The term ‘cake’ has been flying around sewing blogs for a little while now, and I wanted to weigh in on the subject too (because, you know, why not!). 

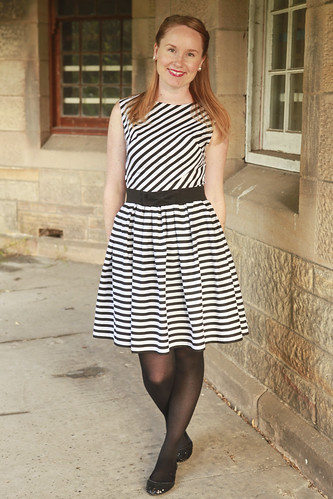
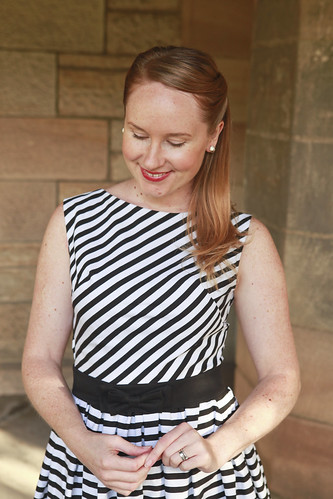
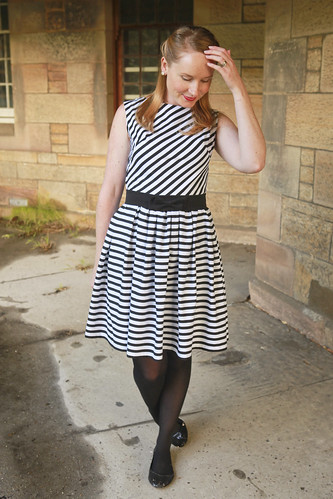
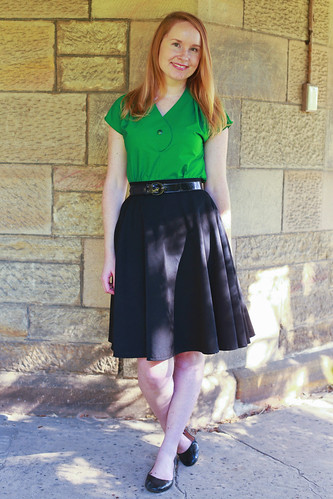
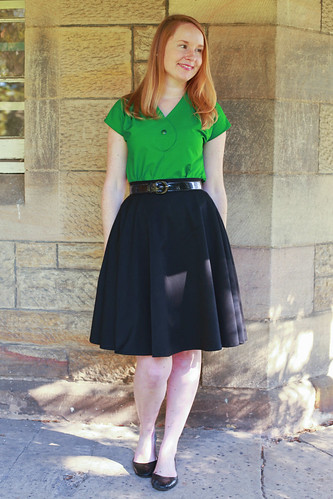
Cake mostly refers to those garments that form staples in your wardrobe. From simple everyday skirts and blouses to dresses for work and other everyday activities. These ‘cakey’ pieces are sometimes talked about as being ‘boring’ pieces to sew up because they are plain and are meant to mix in with the other various pieces in your wardrobe. They don’t necessarily stand out by themselves. 

Icing (or frosting, if you live in America) are those pieces you make that you might, realistically, wear either once or never in some cases. They are those fun pieces that you make out of expensive silks, they have huge pouffy skirts, or long flowing tails. They have plunging necklines or strapless bodices. They have sparkles and bows and are fun fun FUN to sew up!  And let’s be honest, they are what make us want to sew in the first place. 


I really do love the icing, but spending so much time making a garment that you may only wear once or twice just doesn't appeal to me so much anymore. I want functional pieces that work well day to day and that I can wear hundreds of times in lots different ways. 

I’m pleased to say that I think I’ve been sewing up some major cake recently. I’ve made a number of different skirts that have become staples in my wardrobe almost as soon as I finished hemming them.  And while they aren’t necessarily all that interesting to post about, they do make getting dressed in the morning a lot easier to do. 

I have more yummy cake pieces coming for the winter months as well - I’m attempting to make my first pair of pants - eek! Any helpful suggestions most welcome. 

And while we are on the subject of cake, I am taking part in Me Made May for the first time this year! Here is my pledge: 

'I, Jen from Jennifer Lauren Vintage, sign up as a participant of Me-Made-May '13. I endeavour to wear one me made garment each day for the duration of May 2013 with a round up of outfits each week

There are nearly 300 of us participating in some way or another which is totally amazing! I love knowing that there are so many people walking around wearing their own garments.

So, tell me, do you enjoy sewing cake or would you rather just get on with the icing? 

xx
Jen

PS) In other annoying news, you are all probably aware that Google Reader is shutting up shop soon (Bah Humbug!!!). I have switched all my feeds over to Feedly (widely regarded to be the 'next best thing' compared to Reader. It's fine, but it's not Reader...). But I know that many people are switching to Bloglovin as well. 

Even more annoyingly, Bloglovin wants me to 'claim my blog' by posting some code onto a post. I don't know why that's how you have 'claim' it, it's already mine after all and has been for some time. But begrudgingly, here it is...

Follow my blog with Bloglovin

Tutorial: Pretty Bow Belt

Friday, April 26, 2013

Bow belts are so easy to make and can add that pretty little detail to any outfit to finish it off. They are also great for using those scraps of left over fabric you have that you aren't quite sure what to do with.

There are endless options for customising your belt as well. You don't have to make the belt from one single fabric - mix it up and have a different coloured bow and belt, or a different textured knot on the bow.

You can also just make the bow part of this tutorial and use it as a decorative feature on any number of projects from head bands, pillows and cushions, hair pieces, shoe clips...the list is never ending.

So let's get started...

1)
You will need three rectangles of fabric. I used a smaller seam allowance of half an inch but you can add a standard seam allowance of 1.5cm (or 5/8") to all of your pieces (or more or less) as you see fit.

Belt -
Length  = measure your waist and add 2 inches (or more if you fluctuate in this area quite a bit) plus your chosen seam allowance. (FYI - the belt in the image above is cut off, it runs much longer on each side!).
Width = 4inches plus your chosen seam allowance

Bow -
Length = 13.5inches + seam allowance. Width = same as the belt

Knot - 2inches x 2.5inches + seam allowance.

2) Fold all pieces in half length wise, right sides together. Lightly iron.


3) Sew the knot along the raw edges lengthwise only, leaving both ends open. Back tack both ends and trim seam allowance down. Turn rightside out.


 4) Sew the bow together along the raw edges leaving a hole in the middle. Back tack and trim corners.


5) Turn the bow right sides out one side at a time. Use something sharp to poke the corners out (I used my scissors, but be careful if you use these as sometimes they can poke a hole in your corner!)


6) Iron the bow and the knot flat. At this stage you can choose to hand sew the middle opening of the bow shut, but you don't need to as you will be hiding it in the next few steps.


 7) Fold the bow in half. Measure 2.5inches from the loose ends and sew a straight line down, remembering to back tack at each end.


8) Open your loose ends out and push the fold down as per below. Iron flat.


9) Pinch the bow together in the centre. I like to fold my bow right sides together and then fold the edges out to get a nice even crease.


10) Wrap the knot around your crease and secure at the back with a few hand stitches. Voila! You have now made your bow!


11) If you are using interfacing on your belt, apply this now. Then sew raw edges together, from one end of the belt to the other leaving a small gap (this needs to be big enough to turn your belt in the right way!). Clip corners.


12) Turn your belt in the right way and iron. Close the gap you left with a few invisible hand stitches. Tack the bow onto the belt at one end.


13) You can choose any number of different closures for your belt. I used a bar and hook because that is what I had on hand, but you can use buttons, hooks and eyes or snap fasteners. Use what ever you are comfortable with.


14) Ta da! You just made your very own bow belt.


If you make one, I'd love to see it! Let me know in the comments or send me an email - jenniferlauren.is@gmail.com

xx
Jen

Edited to add - you can use interfacing on all pieces, not just the belt, for a stiffer/crisper finish :)


Stripes and Stripes

Tuesday, April 23, 2013
Yay, I've finally finished another of my WIP's! I started making this dress back in January and finished it a week or so ago. It's a pattern that David gave me for Christmas 2011 and it's number 1 on my Sewing List (which I think needs updating now...).

23 Apr 2013 1

23 Apr 2013 4

Pattern 7


I decided to cut the bodice on the bias so that the stripes angled down diagonally like the cover image. To stop the bodice from stretching out because of my cutting it on the bias, I underlined it with a plain white cotton which gives it some much needed stability. Unfortunately, I wouldn't have had enough fabric to also cut the skirt on the bias as well, but I quite like the contrast of the different angled stripes on the top and the bottom.

The pattern called for a bow on one of the shoulders of this dress. But since it's getting cooler here now, and cardigans will soon need to be worn with this dress, and I didn't want to look like I had a lump on my shoulder, I decided to make my own version of a bow belt instead to finish off the look.

23 Apr 2013 6

I'll have a tutorial on how to make your very own version of this bow belt at the end of the week! They are so simple to make and are great for using up those little scraps of fabric that are left over after finishing a project (I made this one from some of the left over fabric from my black circle skirt).

23 Apr 2013 3

23 Apr 2013 5

I ignored the facings for the arm holes, as I usually do, and this time around also ignored the neck facing. Instead, I used black bias binding on both for a neater finish on the inside. I took photos as I did this and will have a tutorial coming up for how to do this in the next few weeks (it's so very very easy by the way!).

Speaking of tutorials, I've been busy working on lots of new content for this little old blog these past two weeks. I've really enjoyed being able to focus on all of the different crafty things I do and also have the time to photograph, write up and share some of the sewing knowledge I've built up over the years. I really hope they will be helpful for some of you either new to sewing or who are wanting ideas on new ways of getting your sewing projects finished.

xx
Jen

Lately...

Saturday, April 20, 2013
I started making my first ever pair of pants ~ insert trembles of fear here ~. Unfortunately, I need to make muslin round two. How predictable...

Monty helps me sew. I have it on very good authority that he is handy with a needle and thread. I am yet to see this in action. Will report back.

Yum!


Taking a break from The Pants and making a violet wrap dress for the autumn instead.

Instagram - jenniferlauren3

XX
Jen

Going Green...

Monday, April 15, 2013
I've been sick for over a week now. I'm not normally a sick person and so I'm very very much over the incessant coughing and general stuffy-ness of this particular sickness. But I have to admit, it's been great for my sewing!

15APR 2013 9 1
15APR 2013 7 1


I made another Afternoon Blouse in a vibrant apple green cotton voile and finally finished a black circle skirt I had cut out in February.

I've also finished a striped black and white number I started back in January (number 1 on my sewing list - photos to come soon) and started a 40's blouse made out of a mint green polka dot cotton. It's really rather lovely and I can't wait to show you!

15APR 2013 8 1
15APR 2013 1 1


Yesterday I left the house for the first time in three days to explore and take some 'finished sewing project' photos. After about three hours of being out, it was nice to go home, curl up and feel sorry for myself on the couch again.

Does being sick help your sewing along at all?

XX
Jen


Monday Monday...

Monday, April 8, 2013
So, I did a really scary thing recently (well, for me anyway!). I quit my job. I don't have another one lined up. And, I'm quite happy about that...

These past few weeks I've been head down, bum up getting through the remaining time at my job, and today is my first Monday of not answering to anyone else but myself in years.

Some of you clever people have already noticed the Etsy mini that has been sitting in my side bar since the beginning of February. Yes! I've finally reopened my shop!

Bunny Pillowcase

Little Girl Pillowcase

Wind Up Mouse Pillowcase

Puppy Pillowcase

I'm not doing clothing at the moment, though that may change (I have ideas...). I am instead focusing on home wares with a 40s/50s childrens illustration focus. My current 4 designs are all hand embroidered, but I am working on the same designs (and so many more!!) using the faster method of hand painting which in turn makes them more wallet friendly. And while I only have cushion covers up at the moment, I will also have tea towels and tote bags available soon.

I was also very very honored to be contacted by the Etsy Australia team who invited me to take part in a product photography day. My shop had literally only been open for only a few weeks so it was exciting that someone had taken notice without me doing all that much to publicise it. It was an awesome day and I got to meet some amazing people who are currently running their own shops in Sydney as well.

I was also recently contacted through Etsy and invited to take part in my first ever market! It's in June and I am looking forward to spending some time crafting and getting things ready.

The reason why I hadn't done a 'proper' blog post about it was because I am in the process of making more items. But time waits for no woman and so while they aren't up yet, I decided it was high time to share what I had been up to. I'll let you know when new products go up over the course of the next few weeks.

And now that I am on my own time (how glorious!), I am crafting and sewing to my hearts content. This makes me so happy. I've been saving and saving and saving and waiting for this moment for so long and now that it's finally here it seems a little unbelieveable.

This first Monday is going to be very sweet. I think I'll now actually start to look forward to them :)

XX
Jen

Auto Post Signature

Auto Post  Signature